


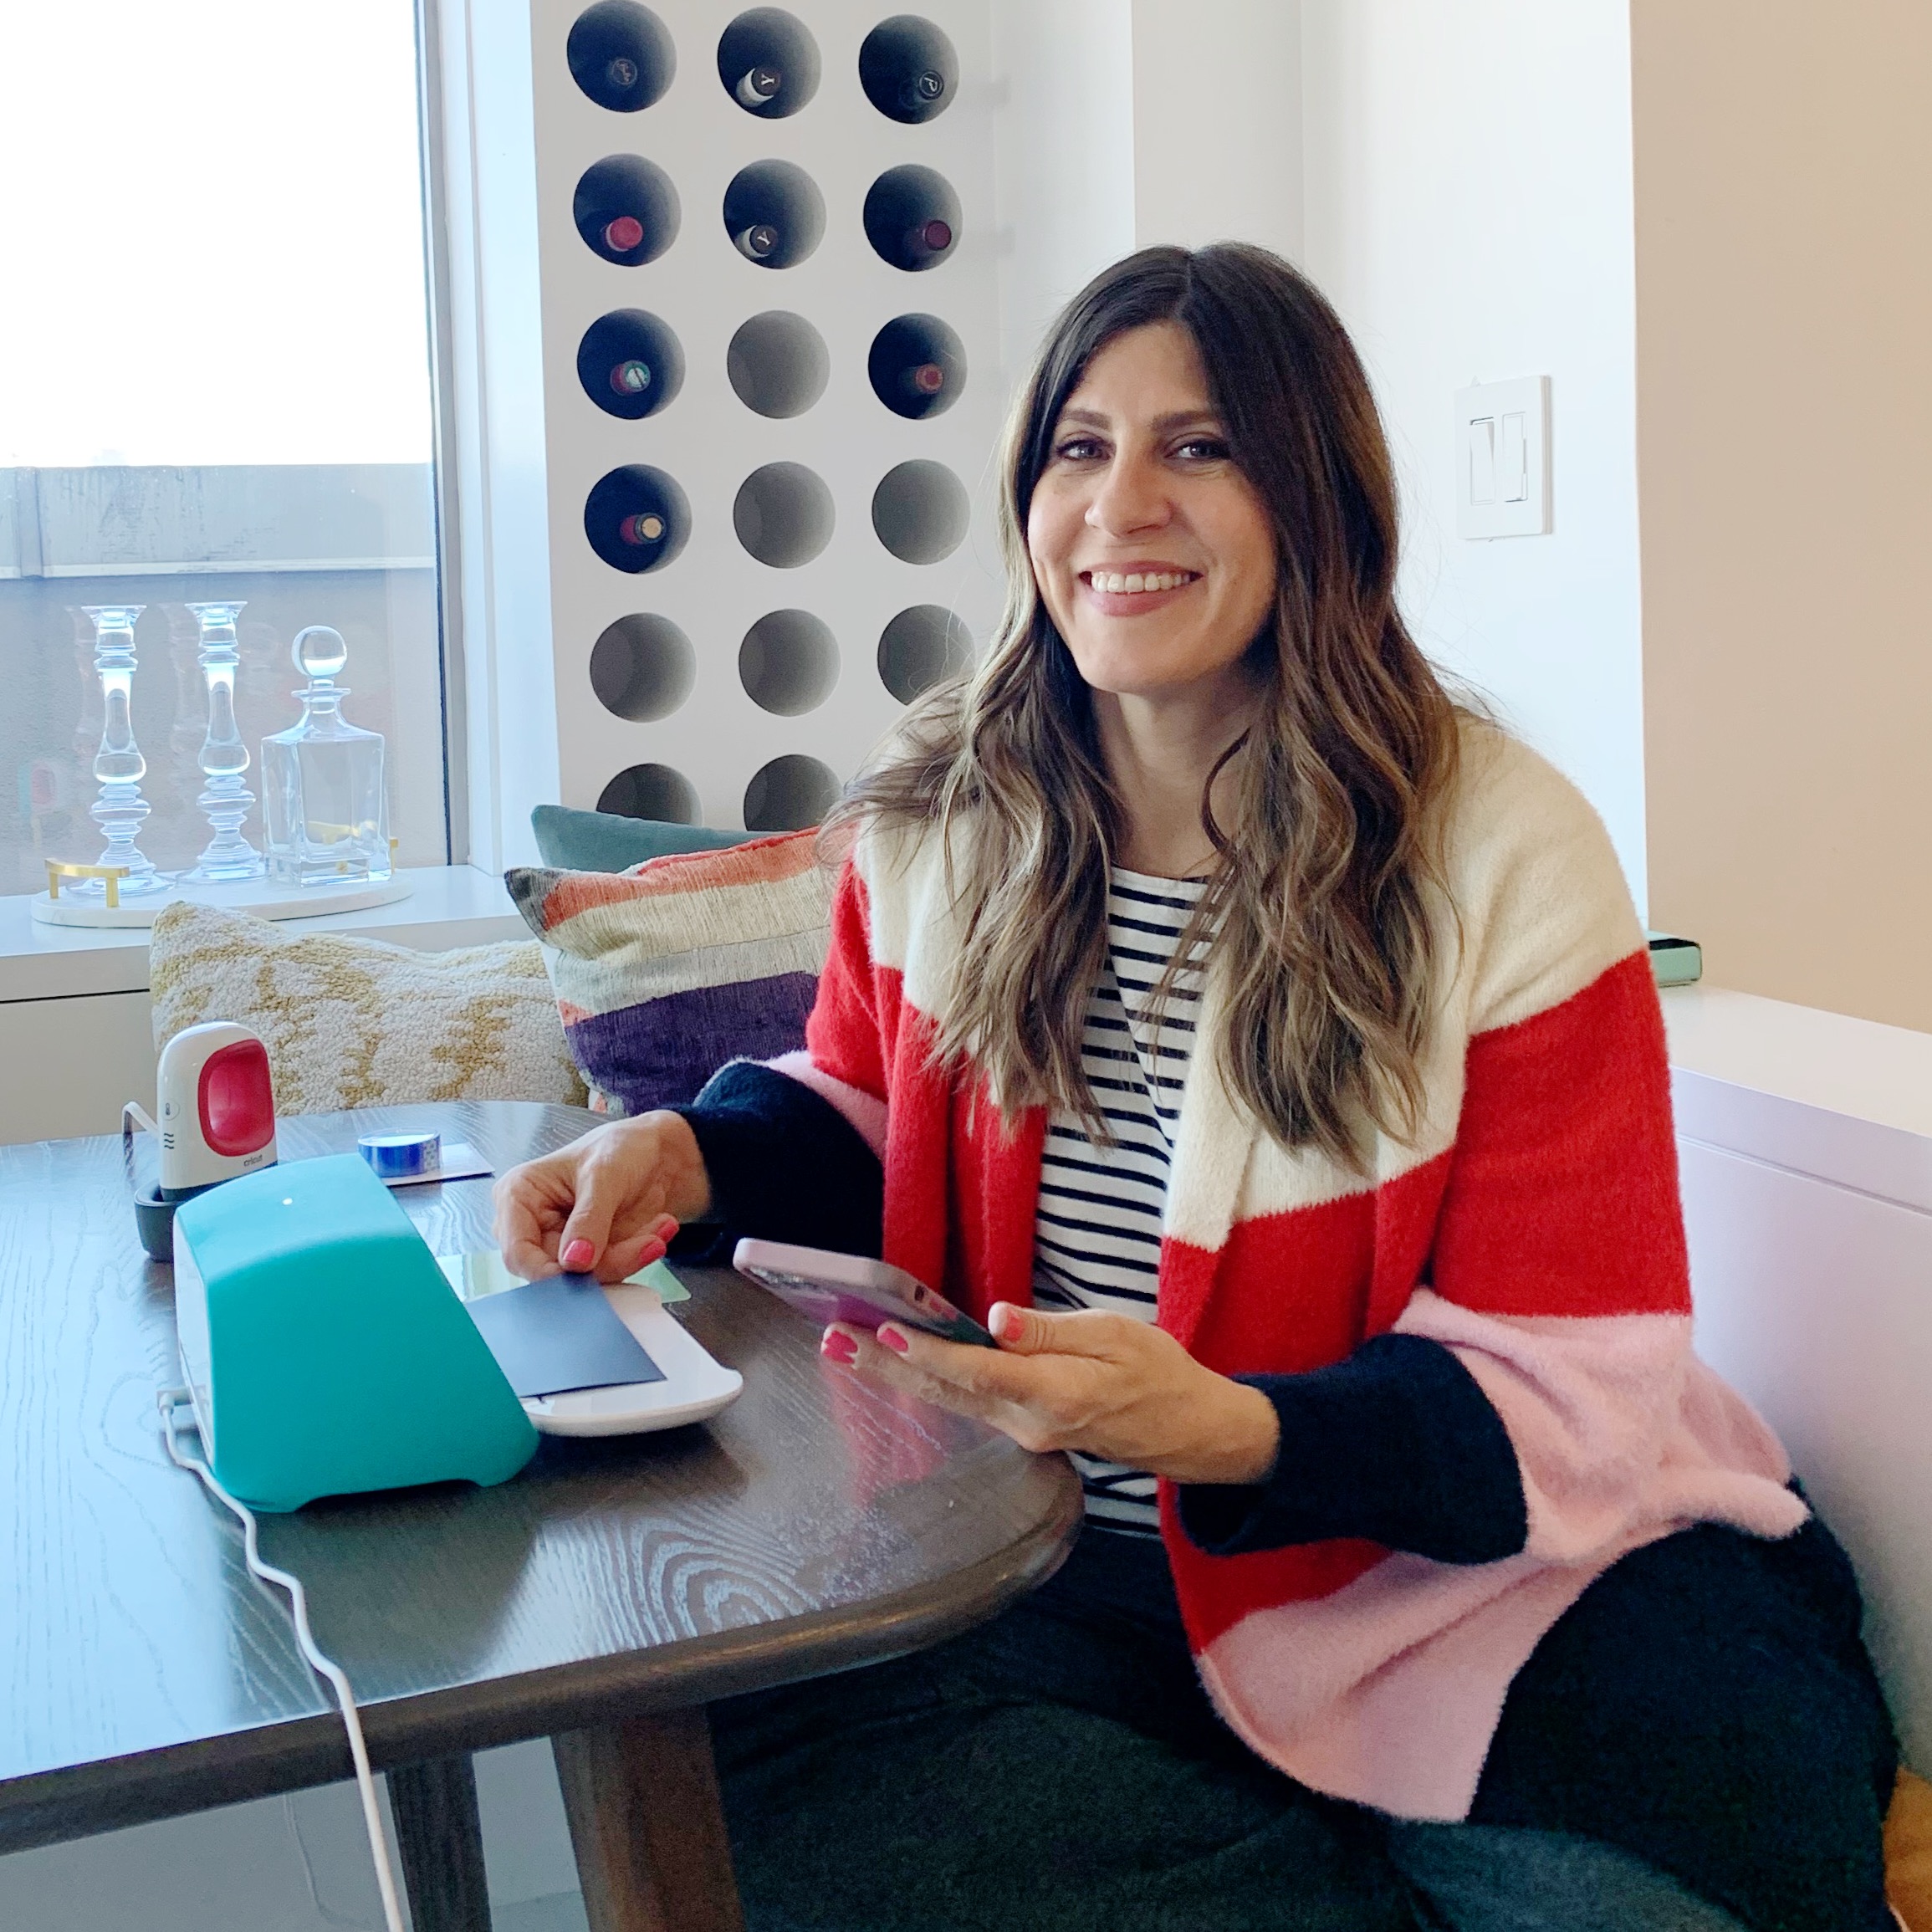
If you’ve ever been to someone’s house who has tons of pretty lettering on mugs, coasters, and tea towels, that person probably has a Cricut machine. Cricuts are computer controlled cutting machines designed for home crafters. They’re great for designing iron-ons for clothes too. When Cricut reached out to me to make a project, the first thing I thought of was my dog. Yep, I’m about to to make some pet fashion for Frankie.
Now, I would not consider myself a “home crafter,” but when put to the task, I always remember how much I enjoy making things that don’t just exist on my phone. I can get a little intimidated by new technology hardware, but I was relieved to find out that the Cricut is super easy to use and you can make something pretty awesome in about 15 minutes.
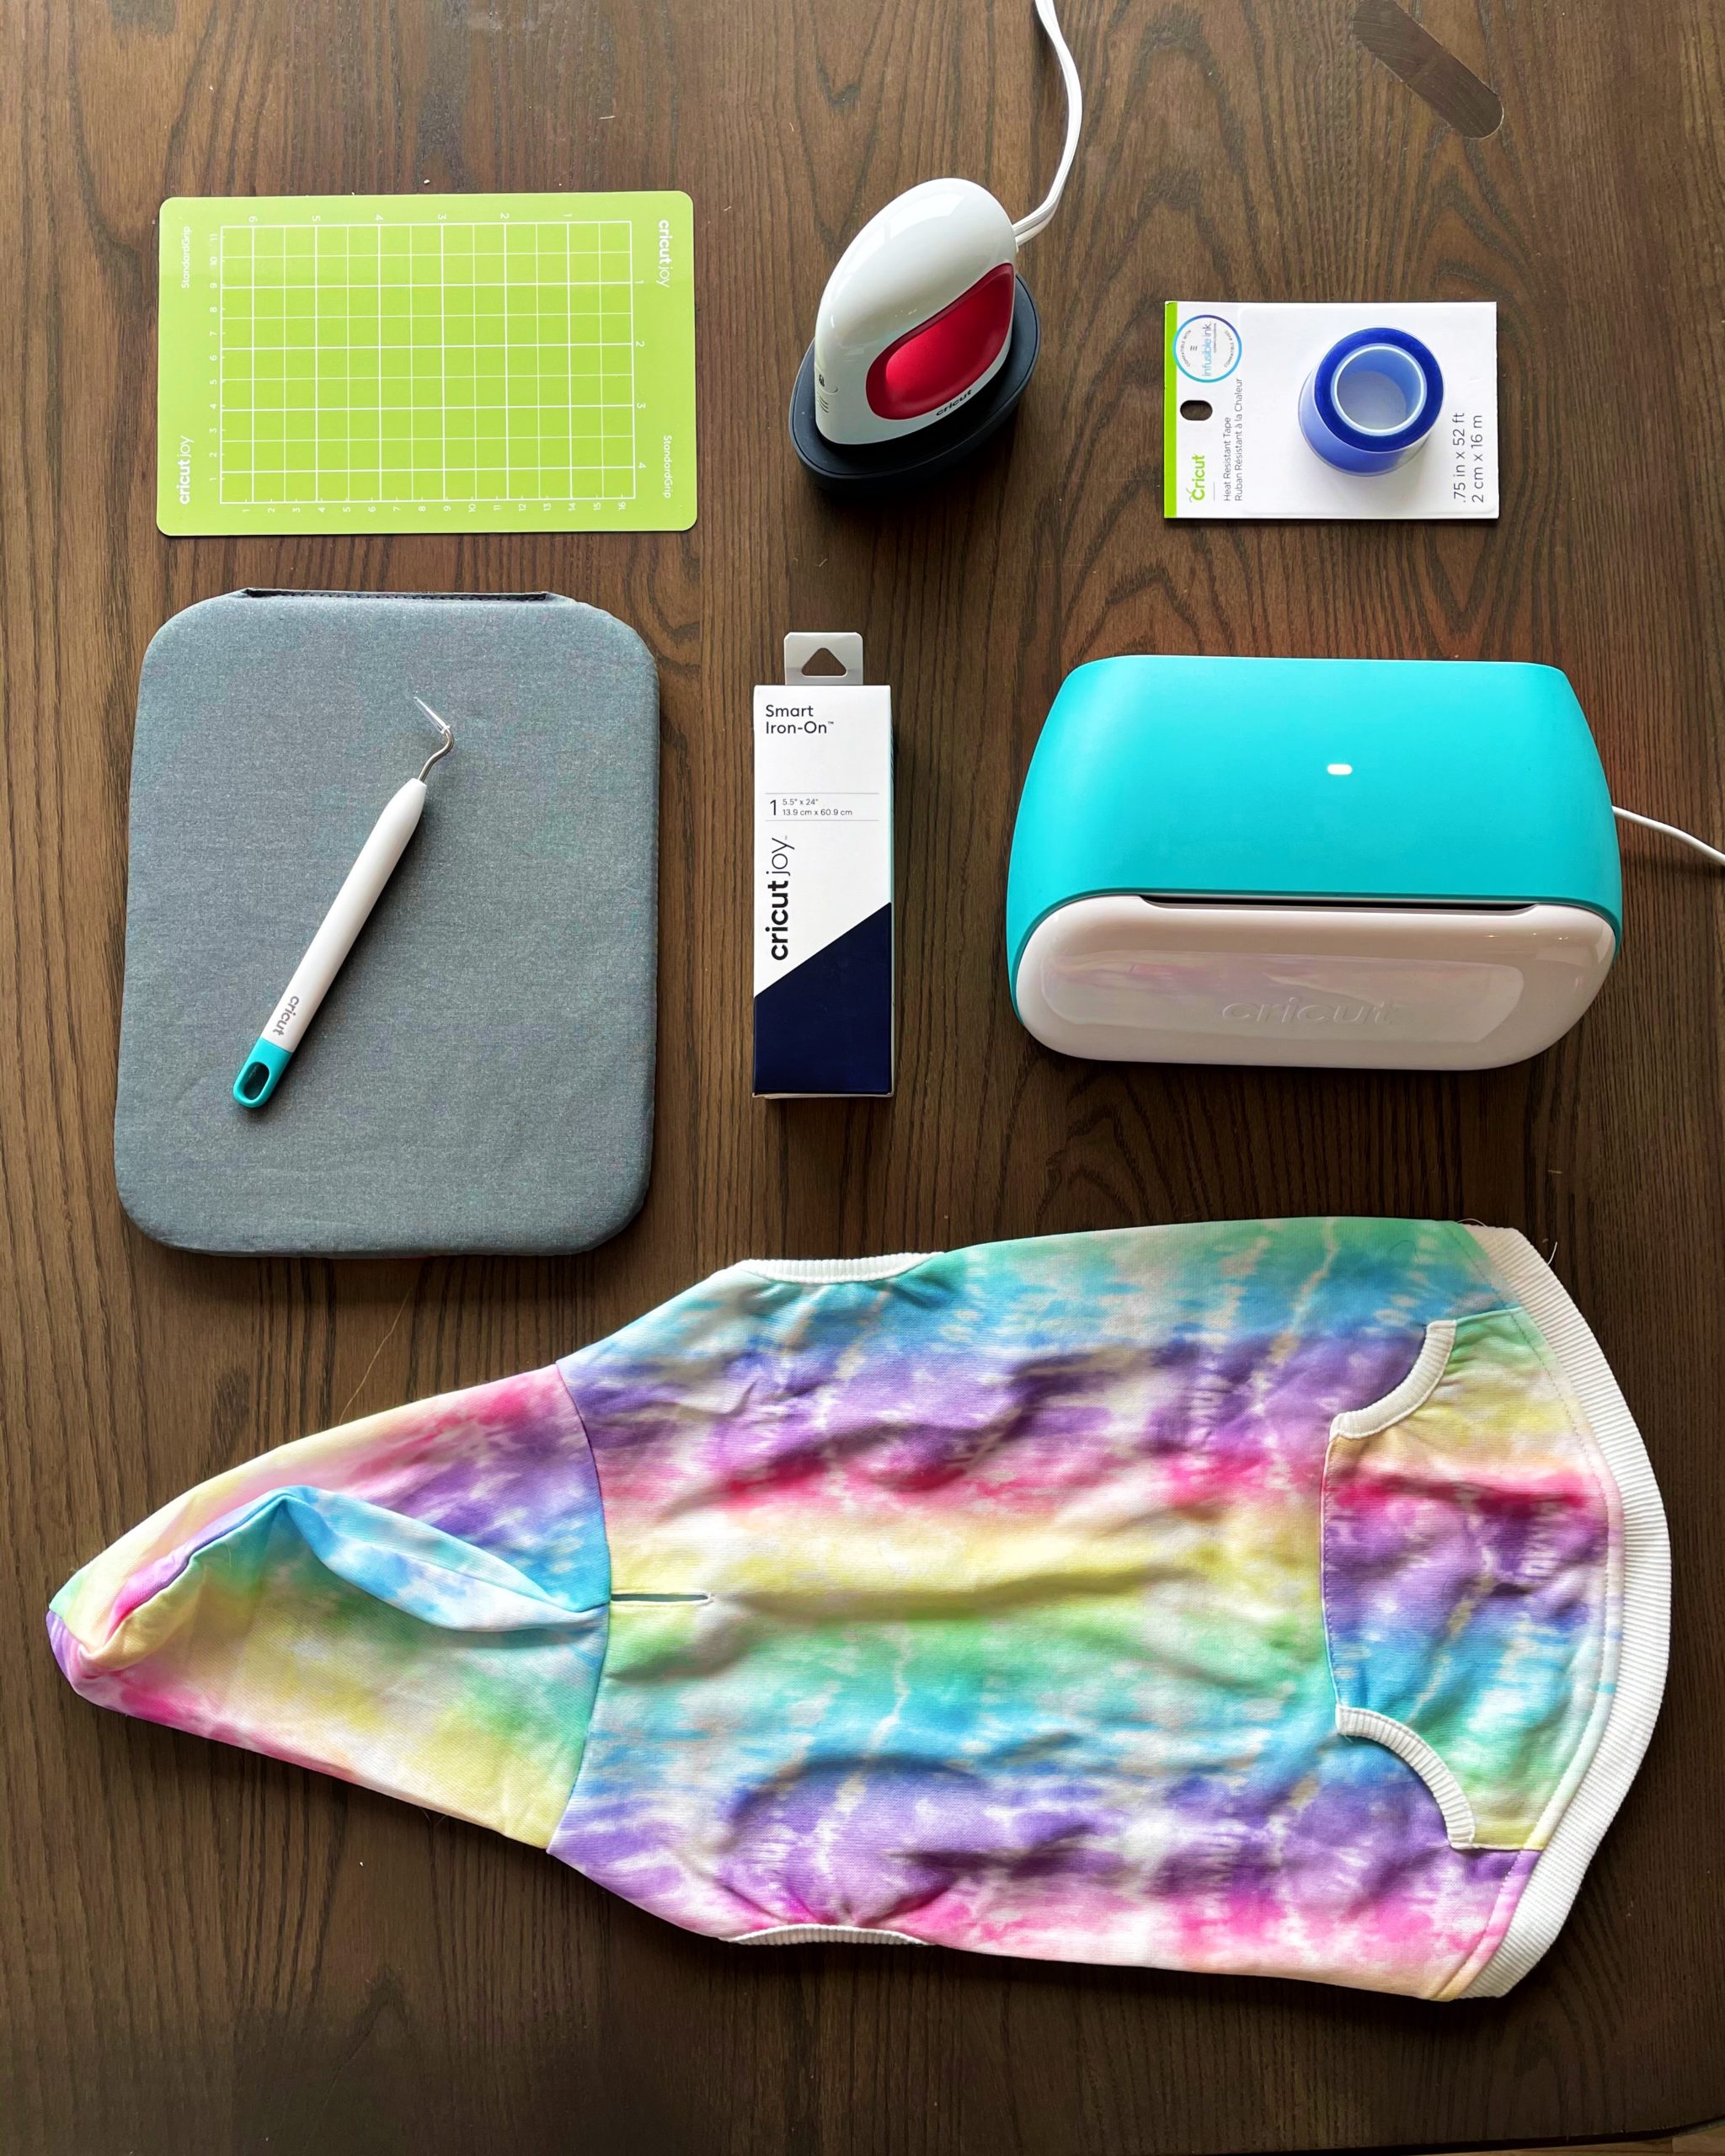
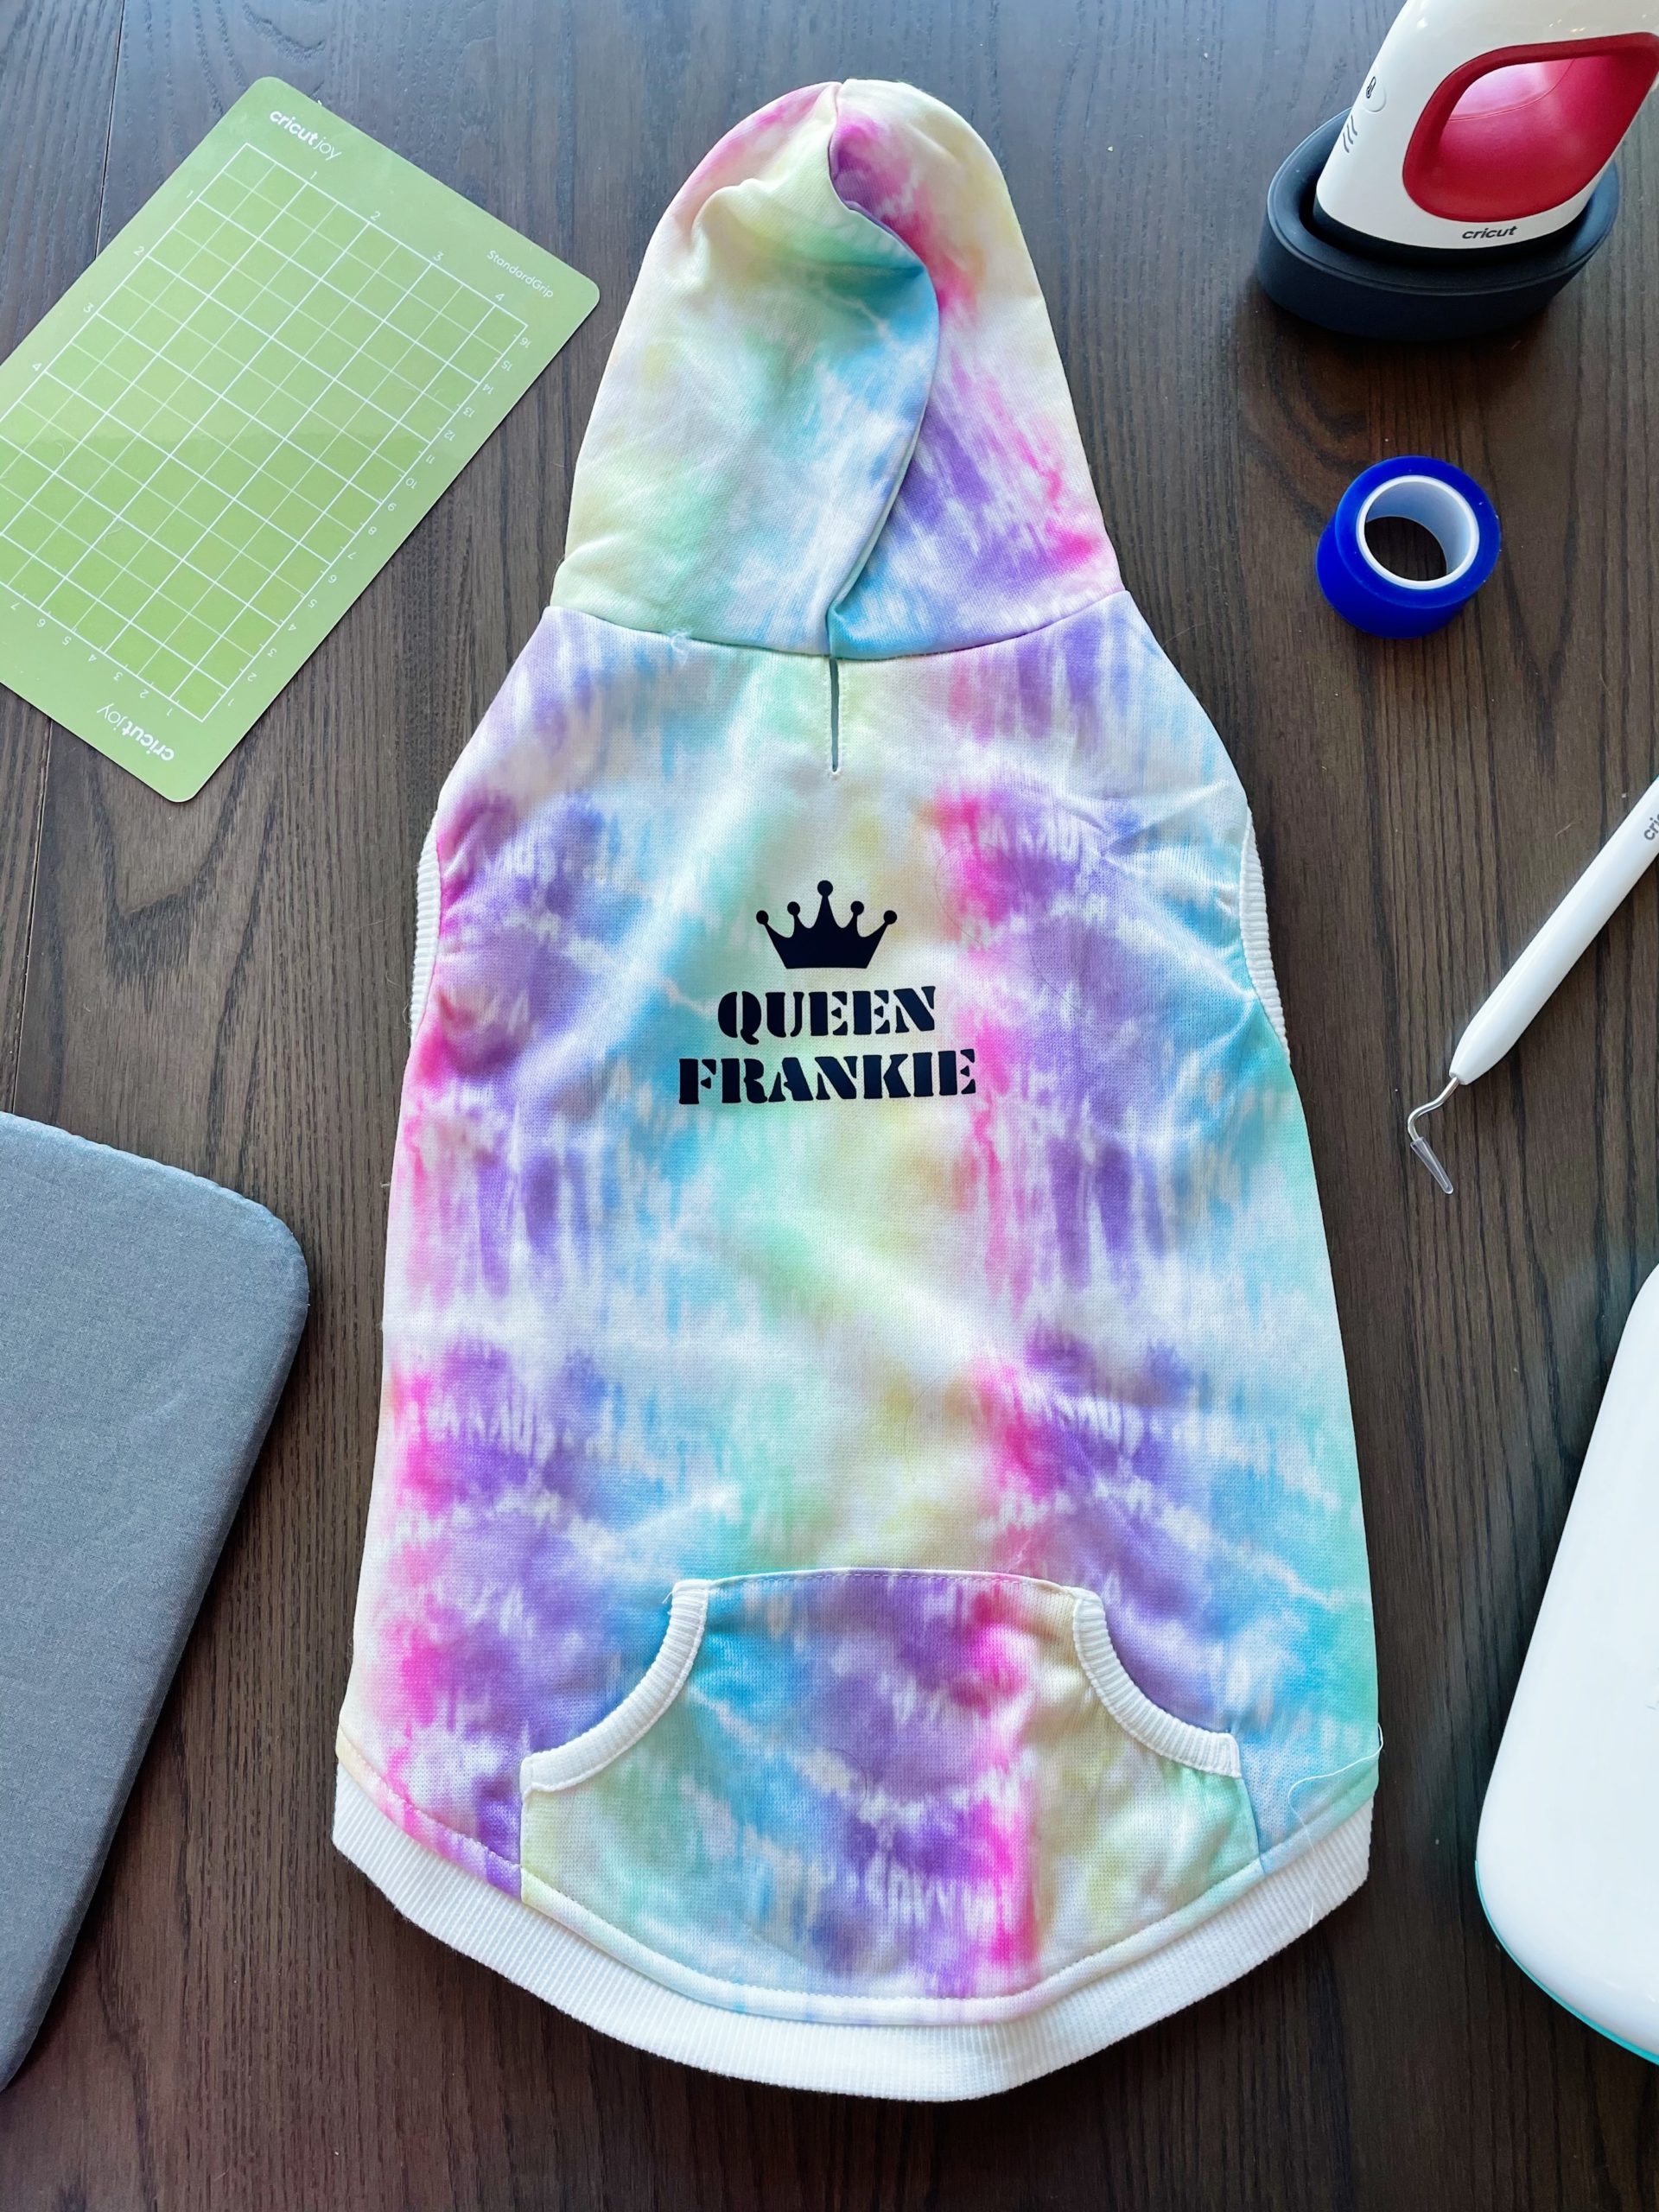
I used the Cricut Joy (the smallest, least expensive and most portable of Cricut’s cutting machines), a mini EasyPress, a weeder, Smart Iron-on material in black, an ironing mat and heat resistant tape. Then I bought a selection of dog onesies. My favorite was the hooded tie dye onesie, so let’s start with that.
Step 1:
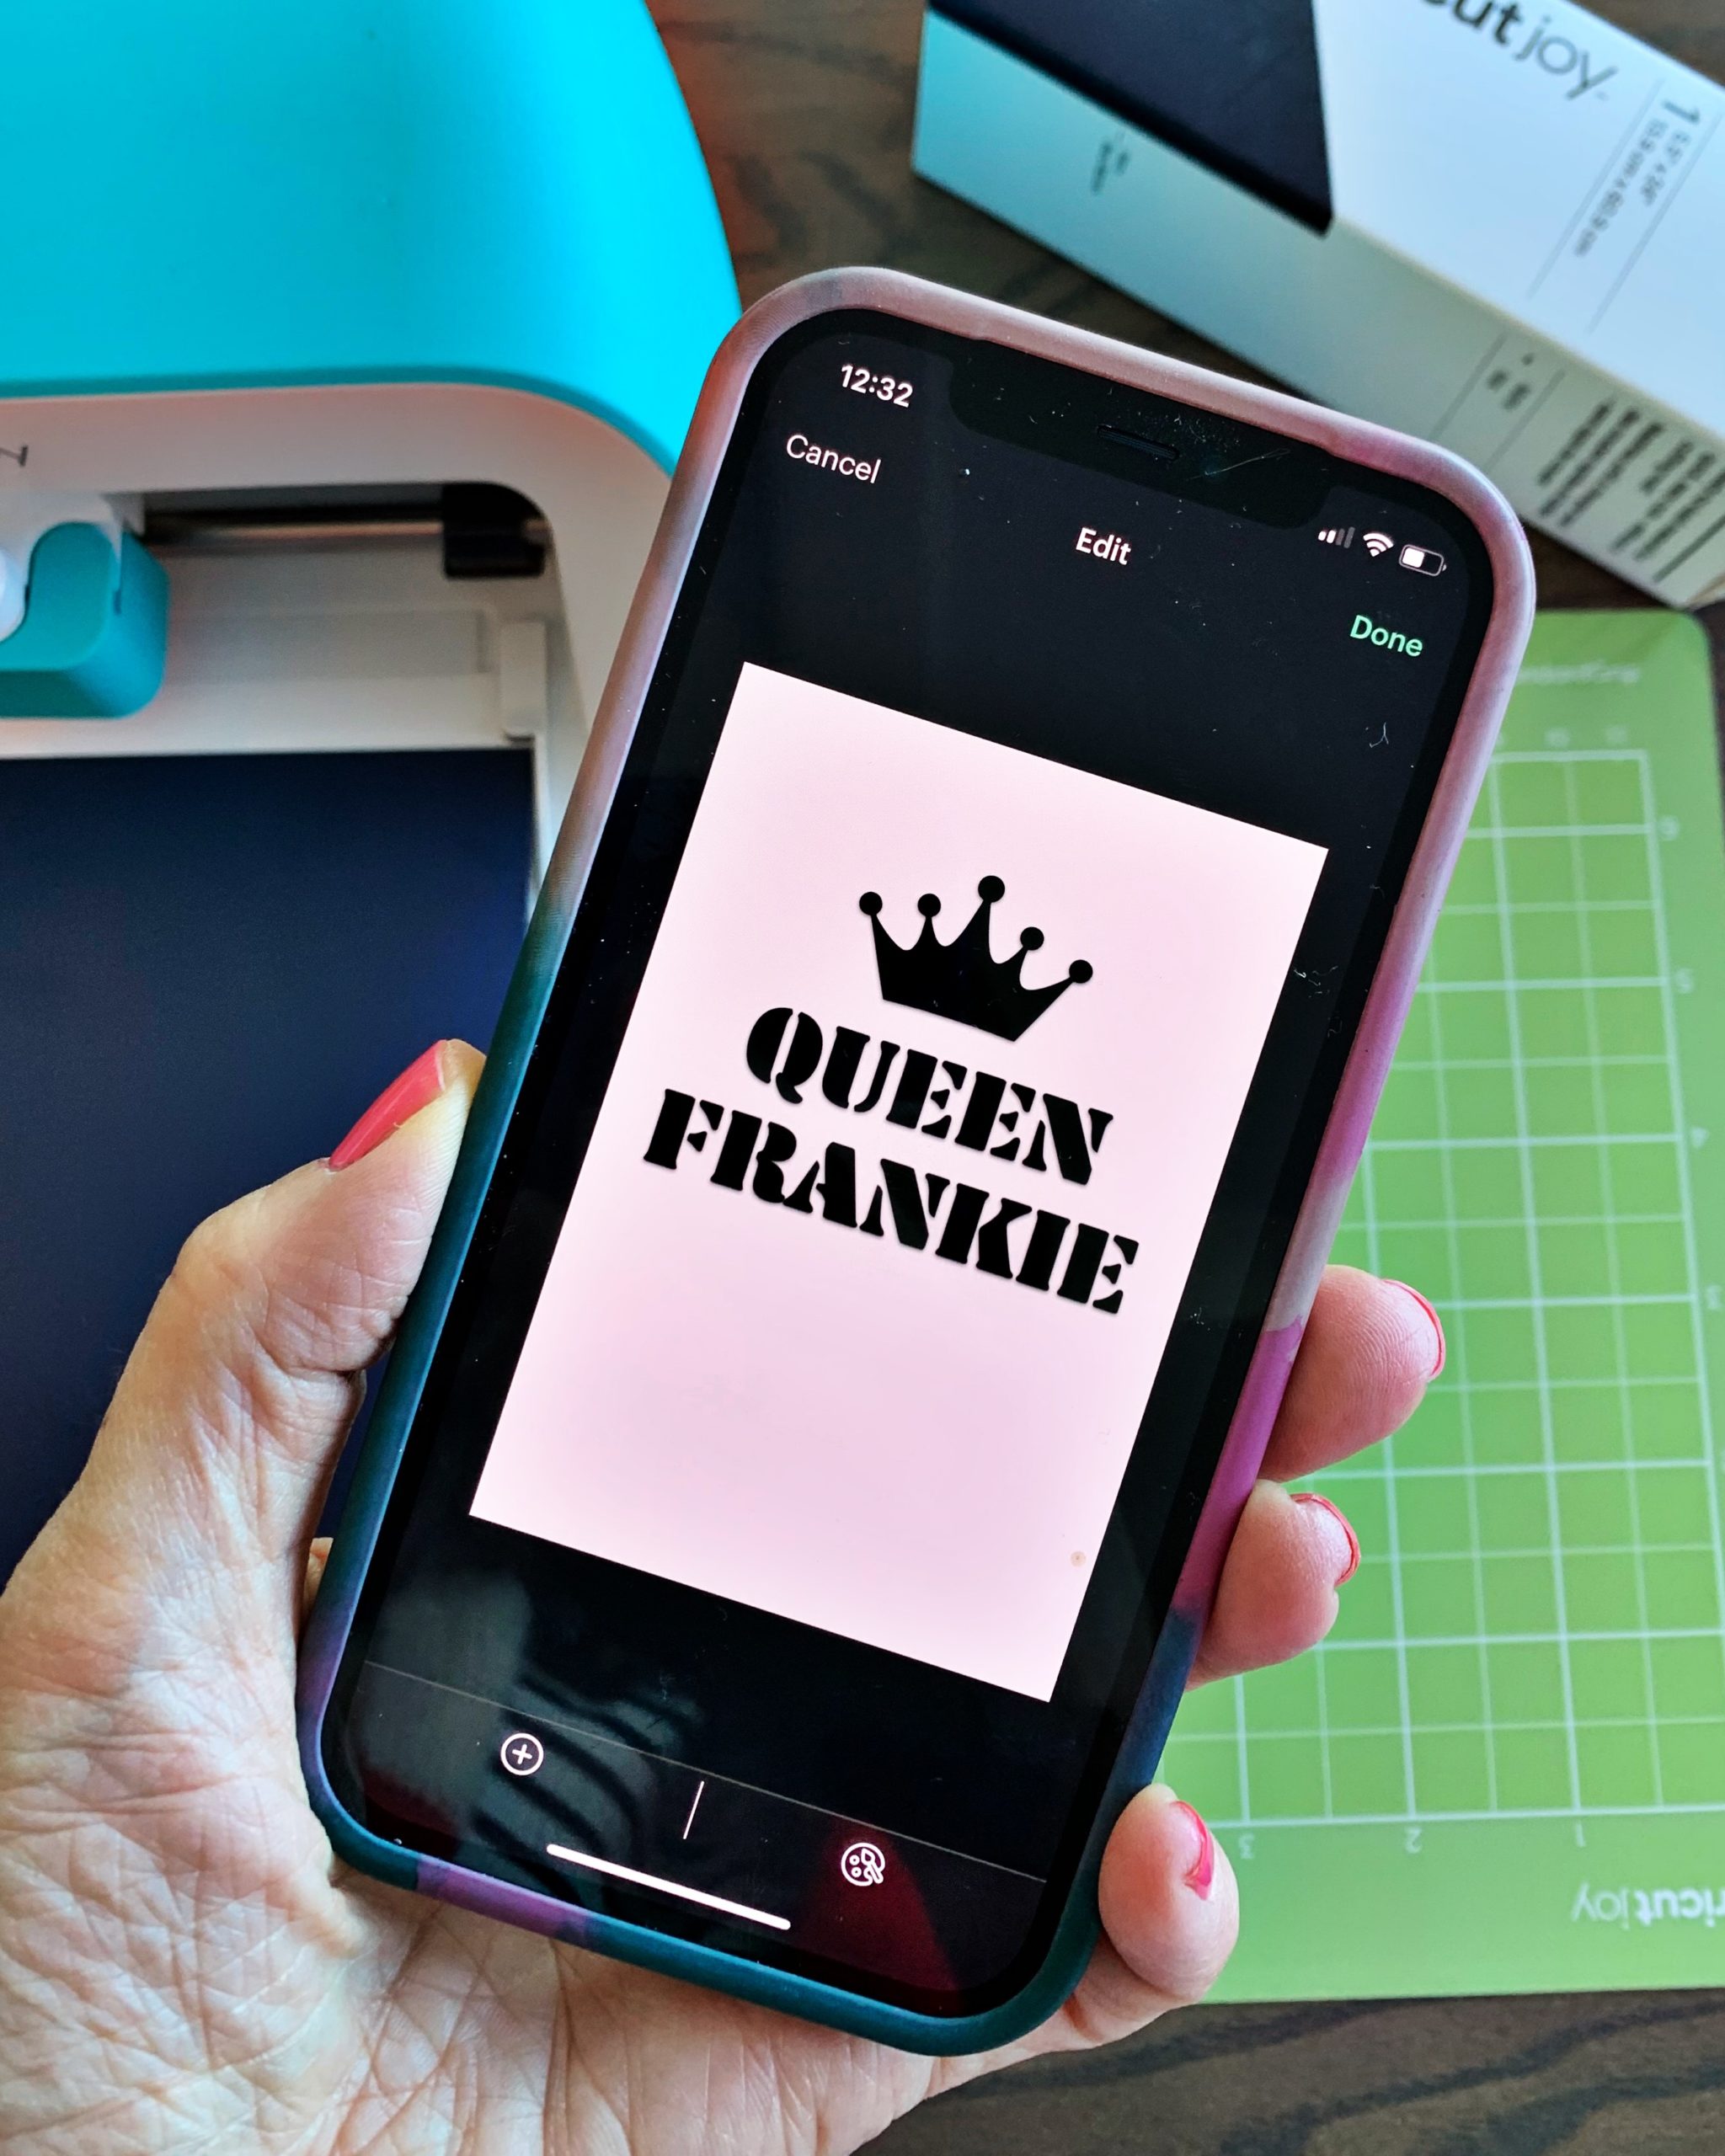
Design your iron-on in the Cricut Joy app or using the Cricut desktop software. Personally, I prefer the ease of doing things on my phone. The app has easy to select font options, graphics and the freedom to change size, alignment and placement.
Step 2:
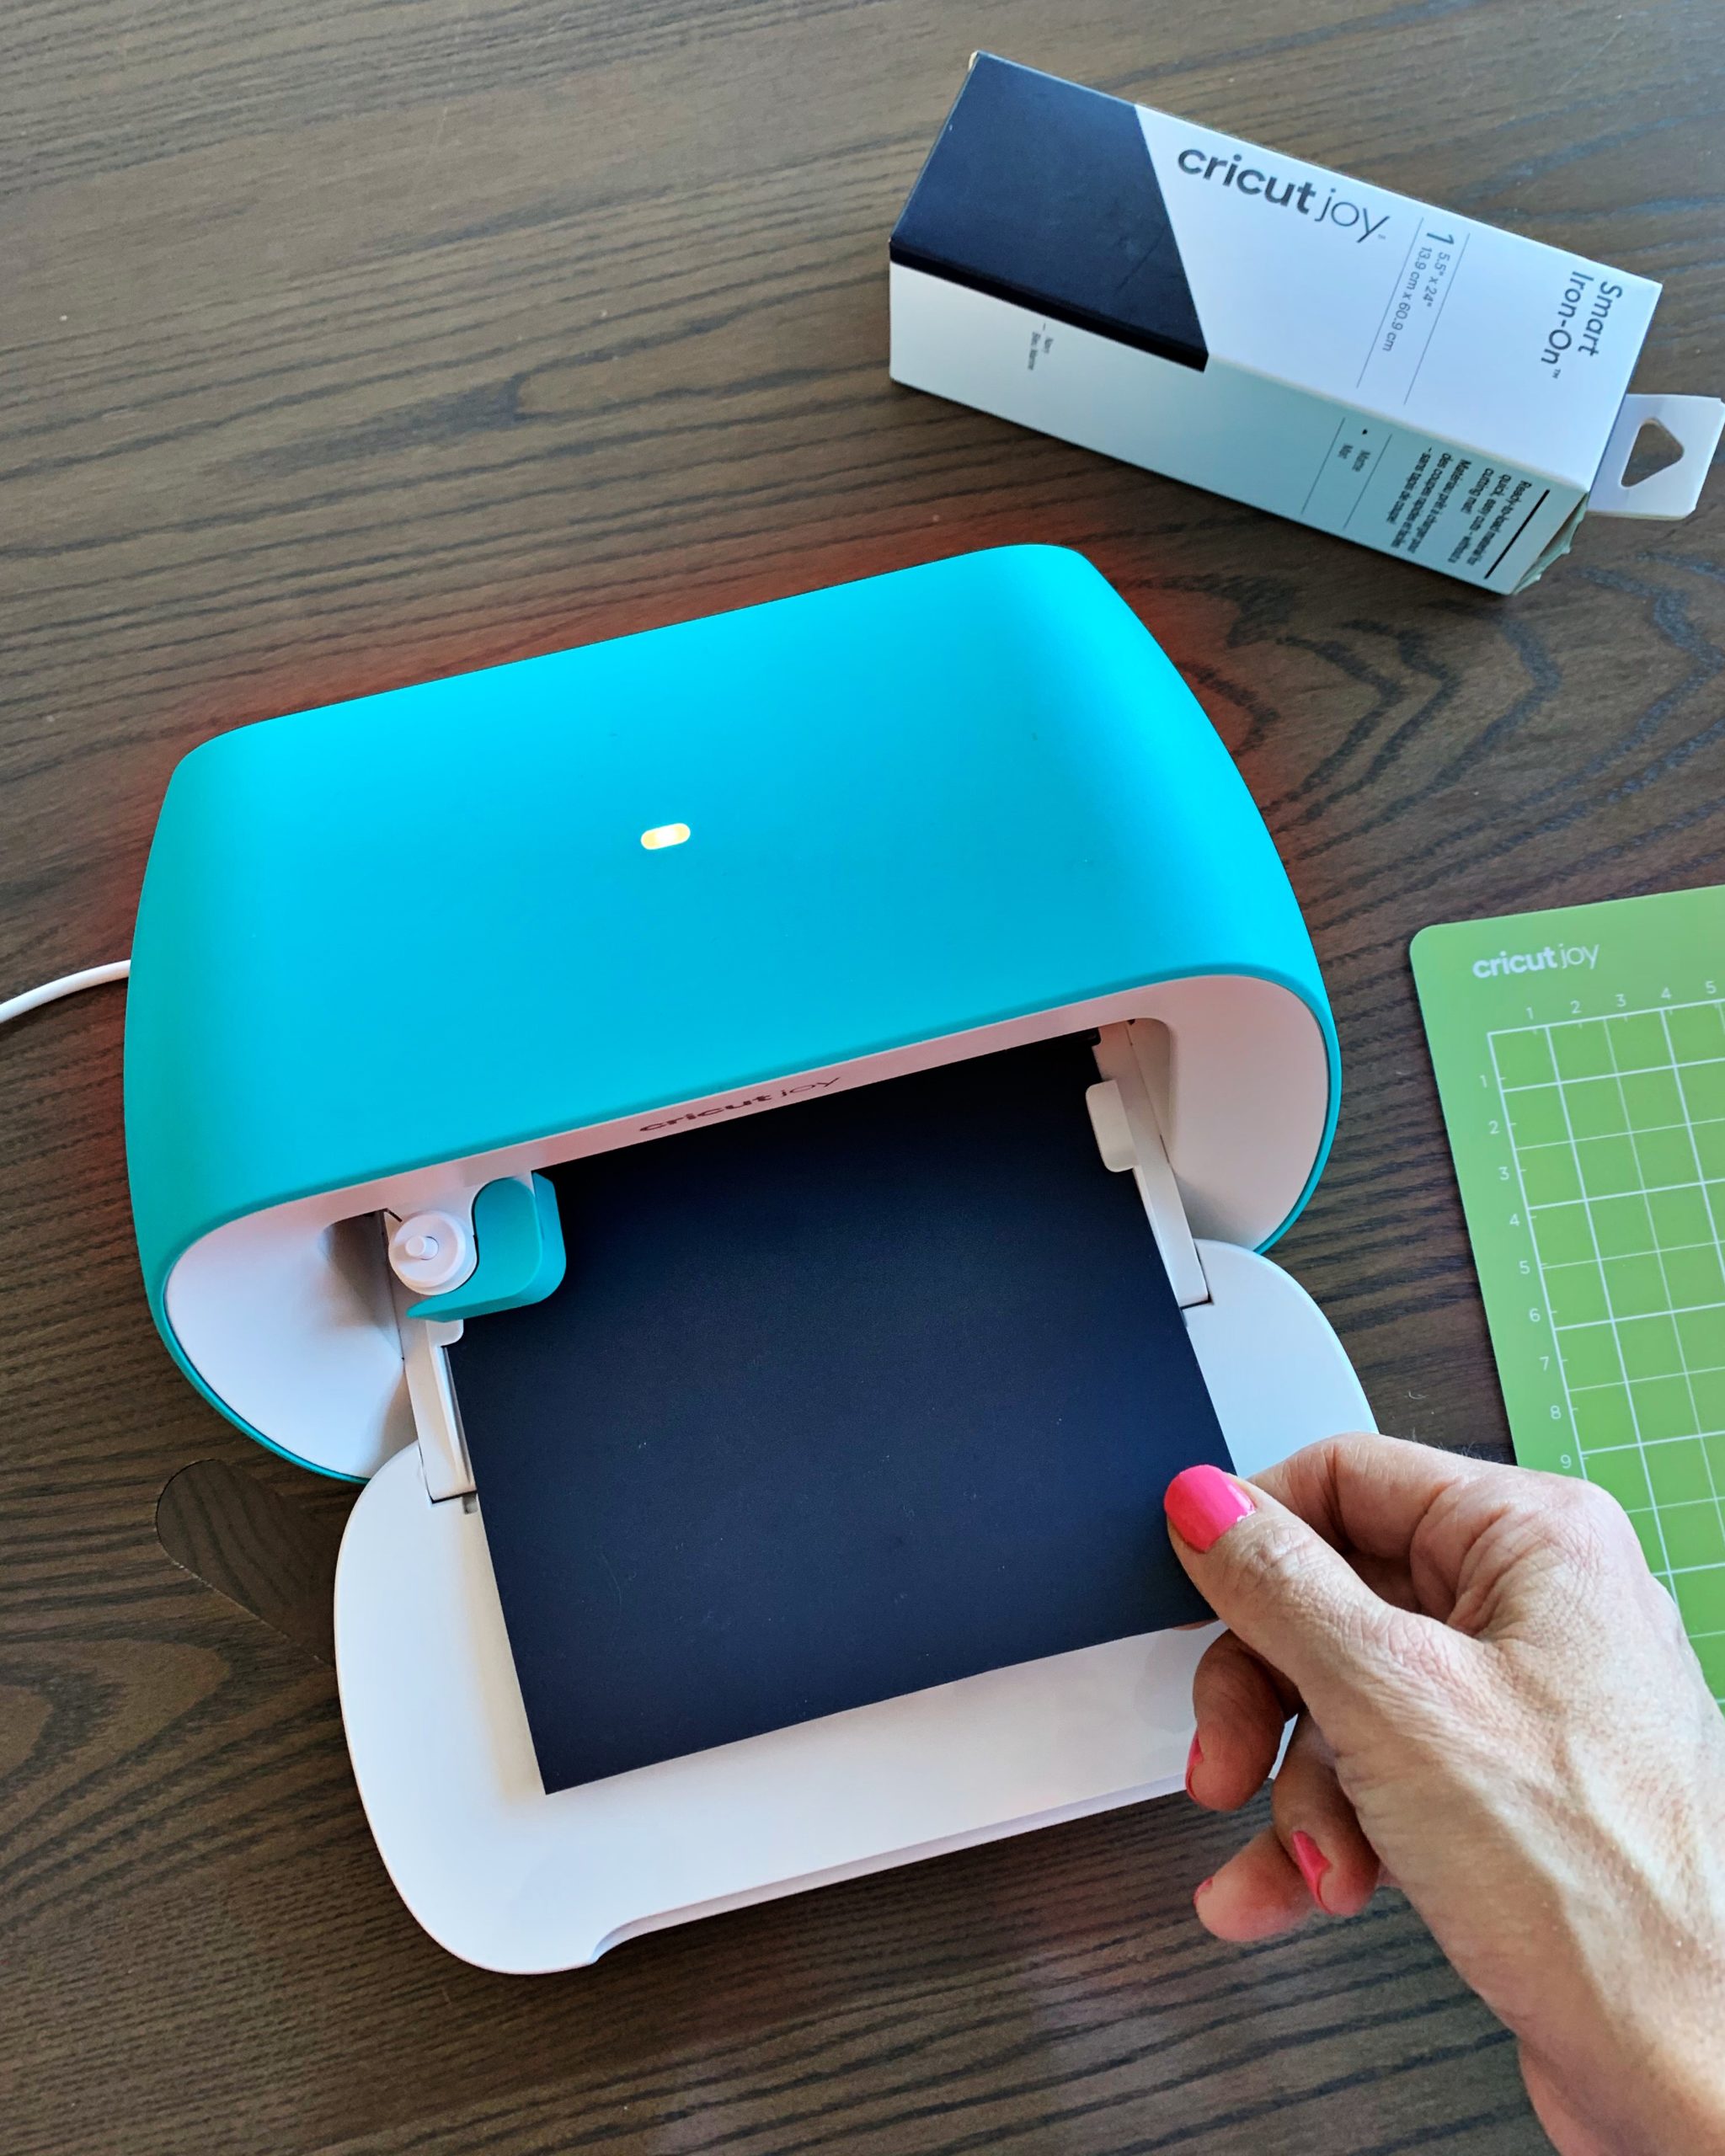
Cut your Smart Iron-On material to the size required. It will tell you the size you need in the project overview on the app, after you designed your graphic. Then insert your material into the Cricut Joy, shiny side down. Make sure your blade is in the machine. FYI, you don’t need a mat if you are using the Cricut Joy.
Step 3:
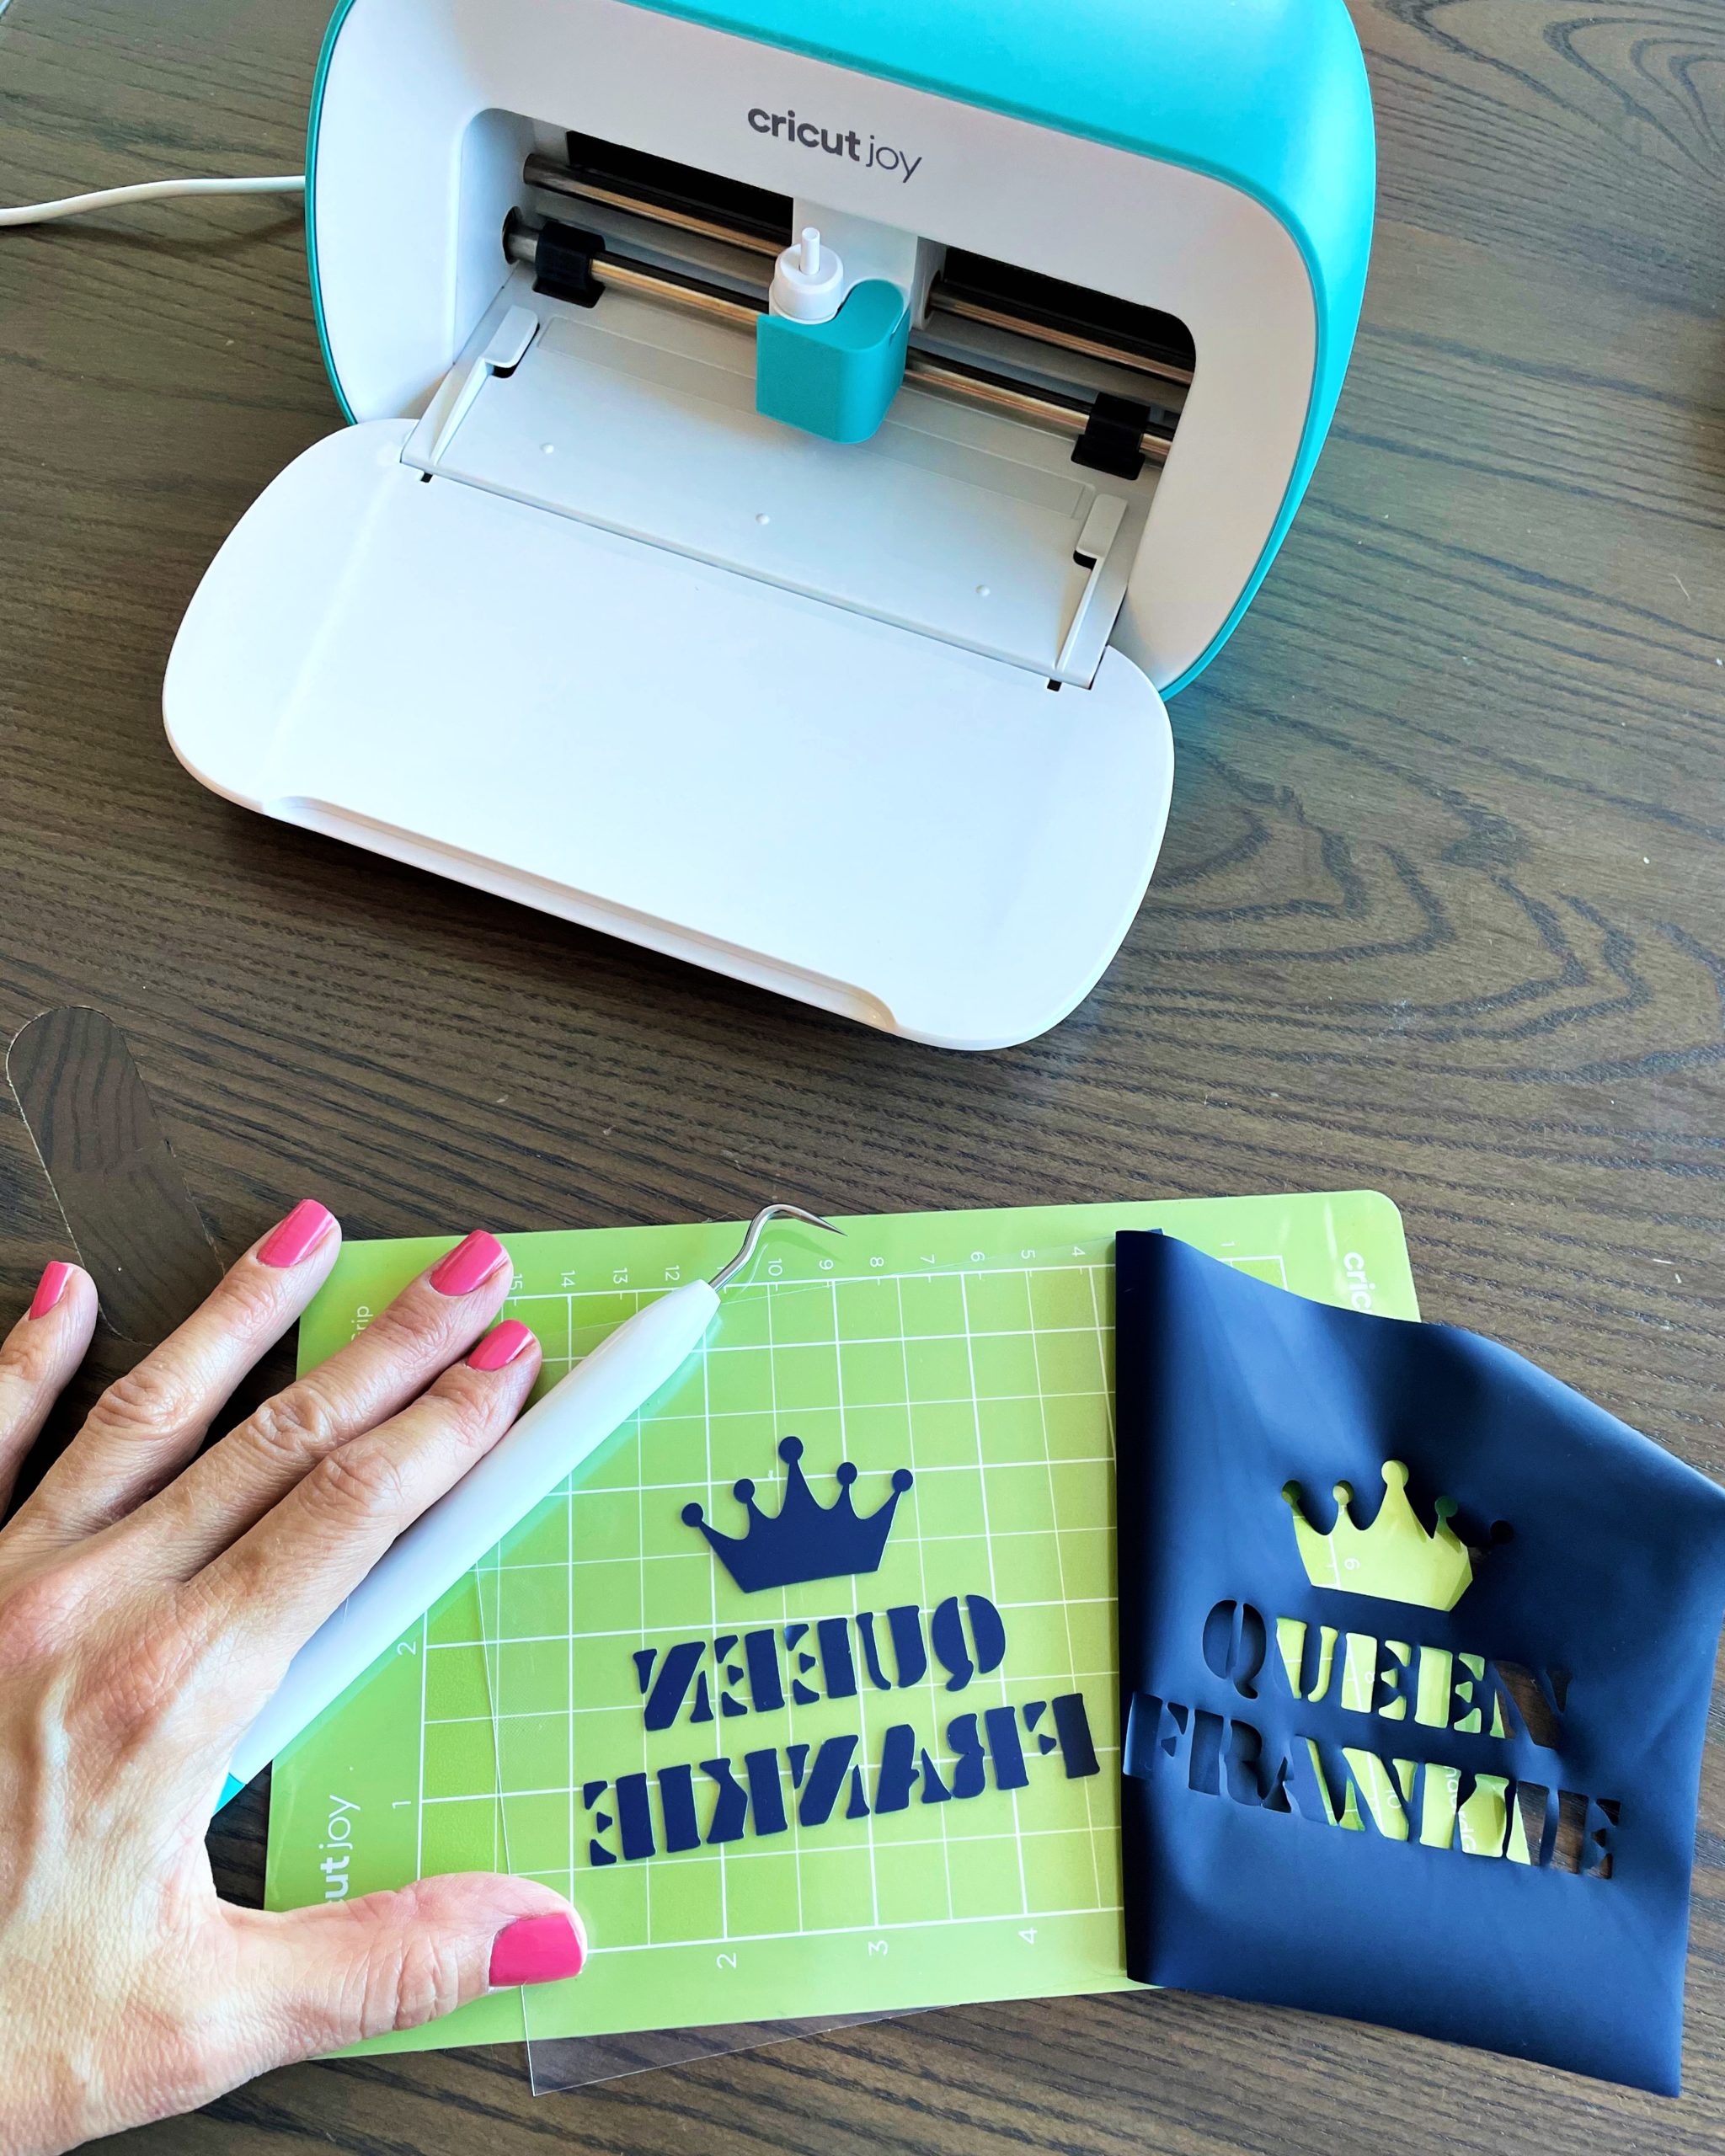
Unload your material after the Cricut Joy has finished cutting. Then place your material on a surface (I used the measuring pad that came with the machine) and use your weeder to remove all excess material. I find it easiest to pick at the top left corner with the point of the weeder and then pull down.
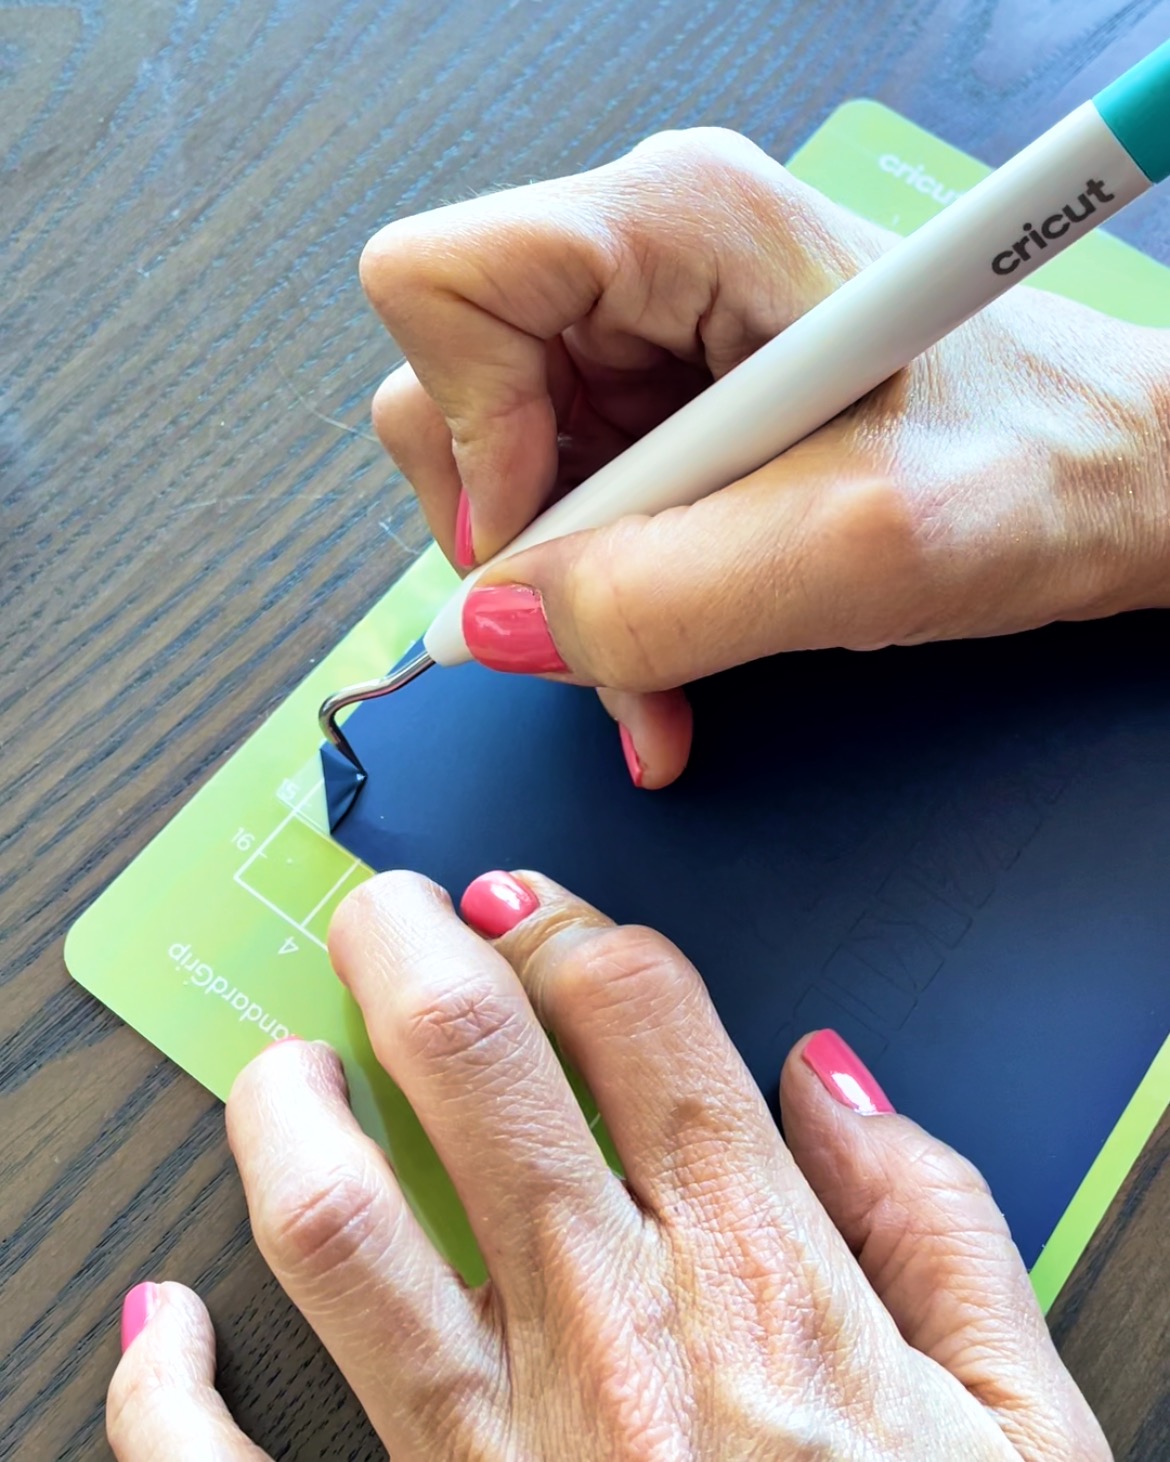
You want to make sure you remove the excess from around your design and from within it, in case you have any graphics or letters that have an interior piece of material that needs removal. Just use your weeder to remove the individual pieces.
Step 4:
Place your garment on the ironing pad. Use a lint roller to make sure there are is no extra fuzz or dog hair on the material. Then place your design on the garment, liner (shiny) side up. In most cases, the liner adhesive will hold your design in place on your base material during transfer, but if you are having an issue, you can use Heat Resistant Tape to secure your design in place for pressing.
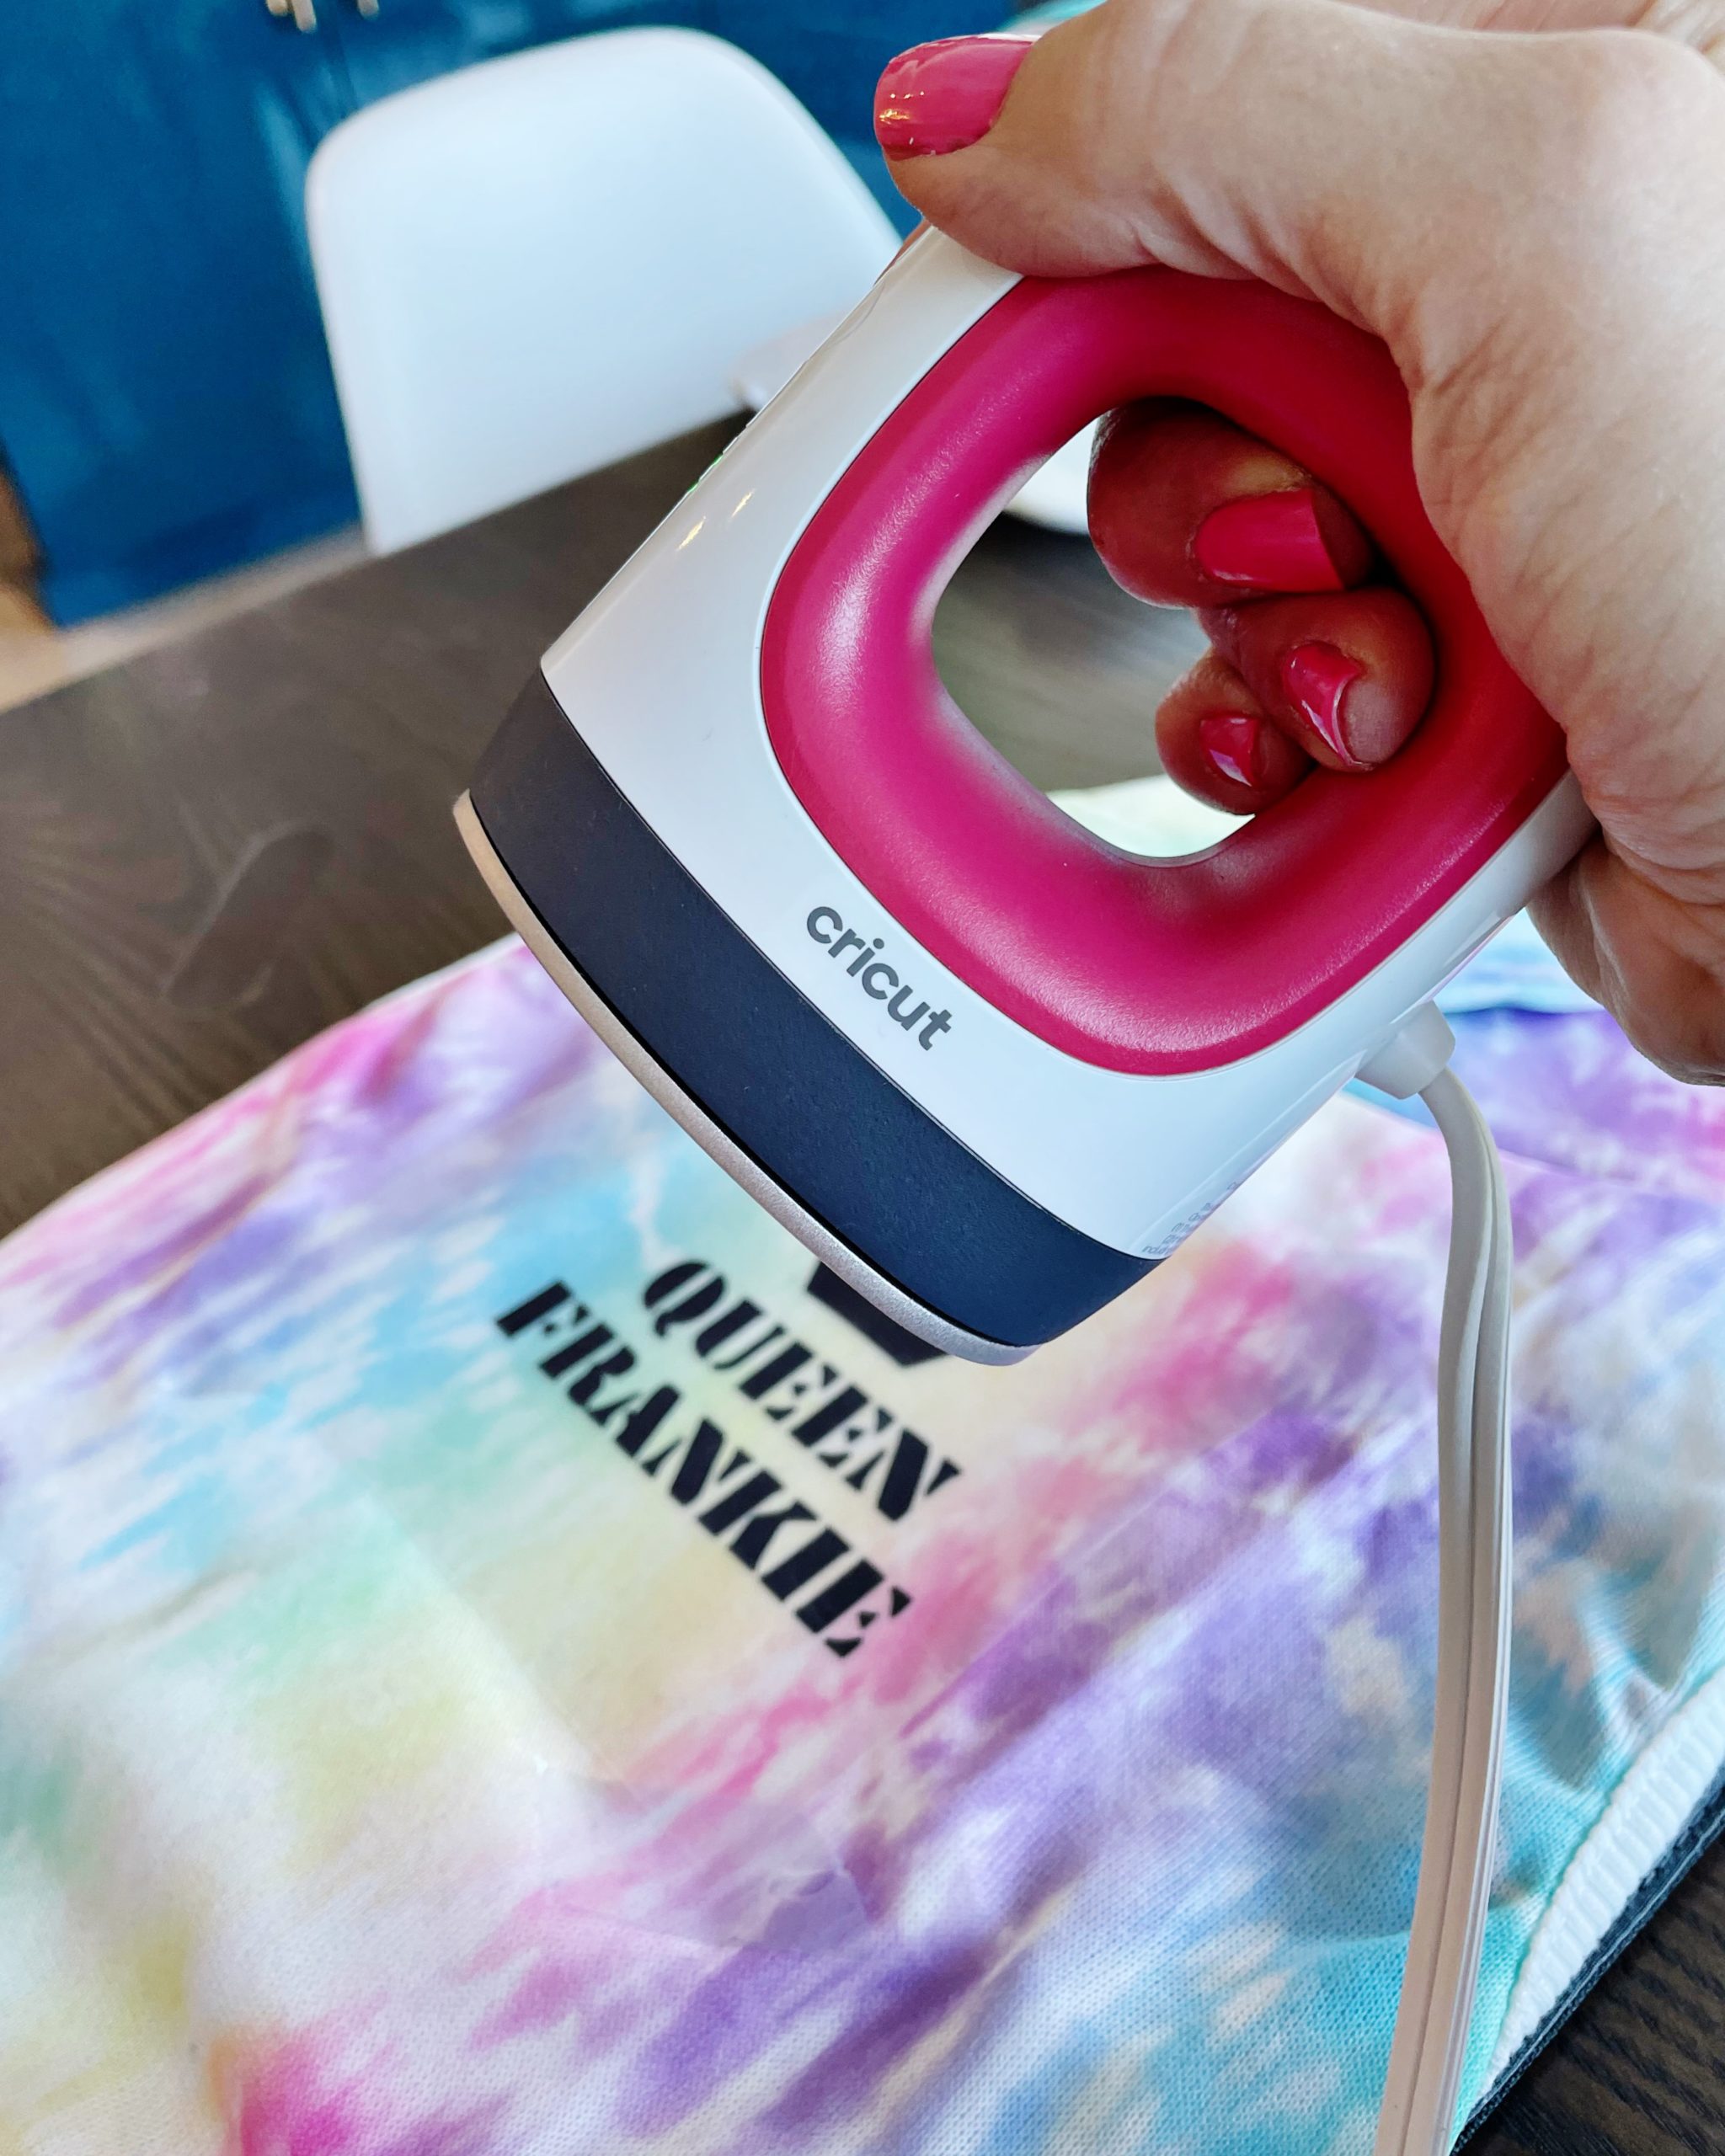
Step 5:
Plug in your EasyPress and set to the correct temperature. For cotton or polyester, you want your EasyPress to be on the middle bar. Cover your design with the EasyPress, pressing down while moving it around the graphic for 25 seconds. Then flip your garment and press down firmly with the EasyPress for 15 seconds. You can always consult the Cricut Heat Guide for detailed instructions.

Step 6:
Wait until the iron-on cools completely and then peel off slowly to reveal the design underneath, now adhered to the garment.
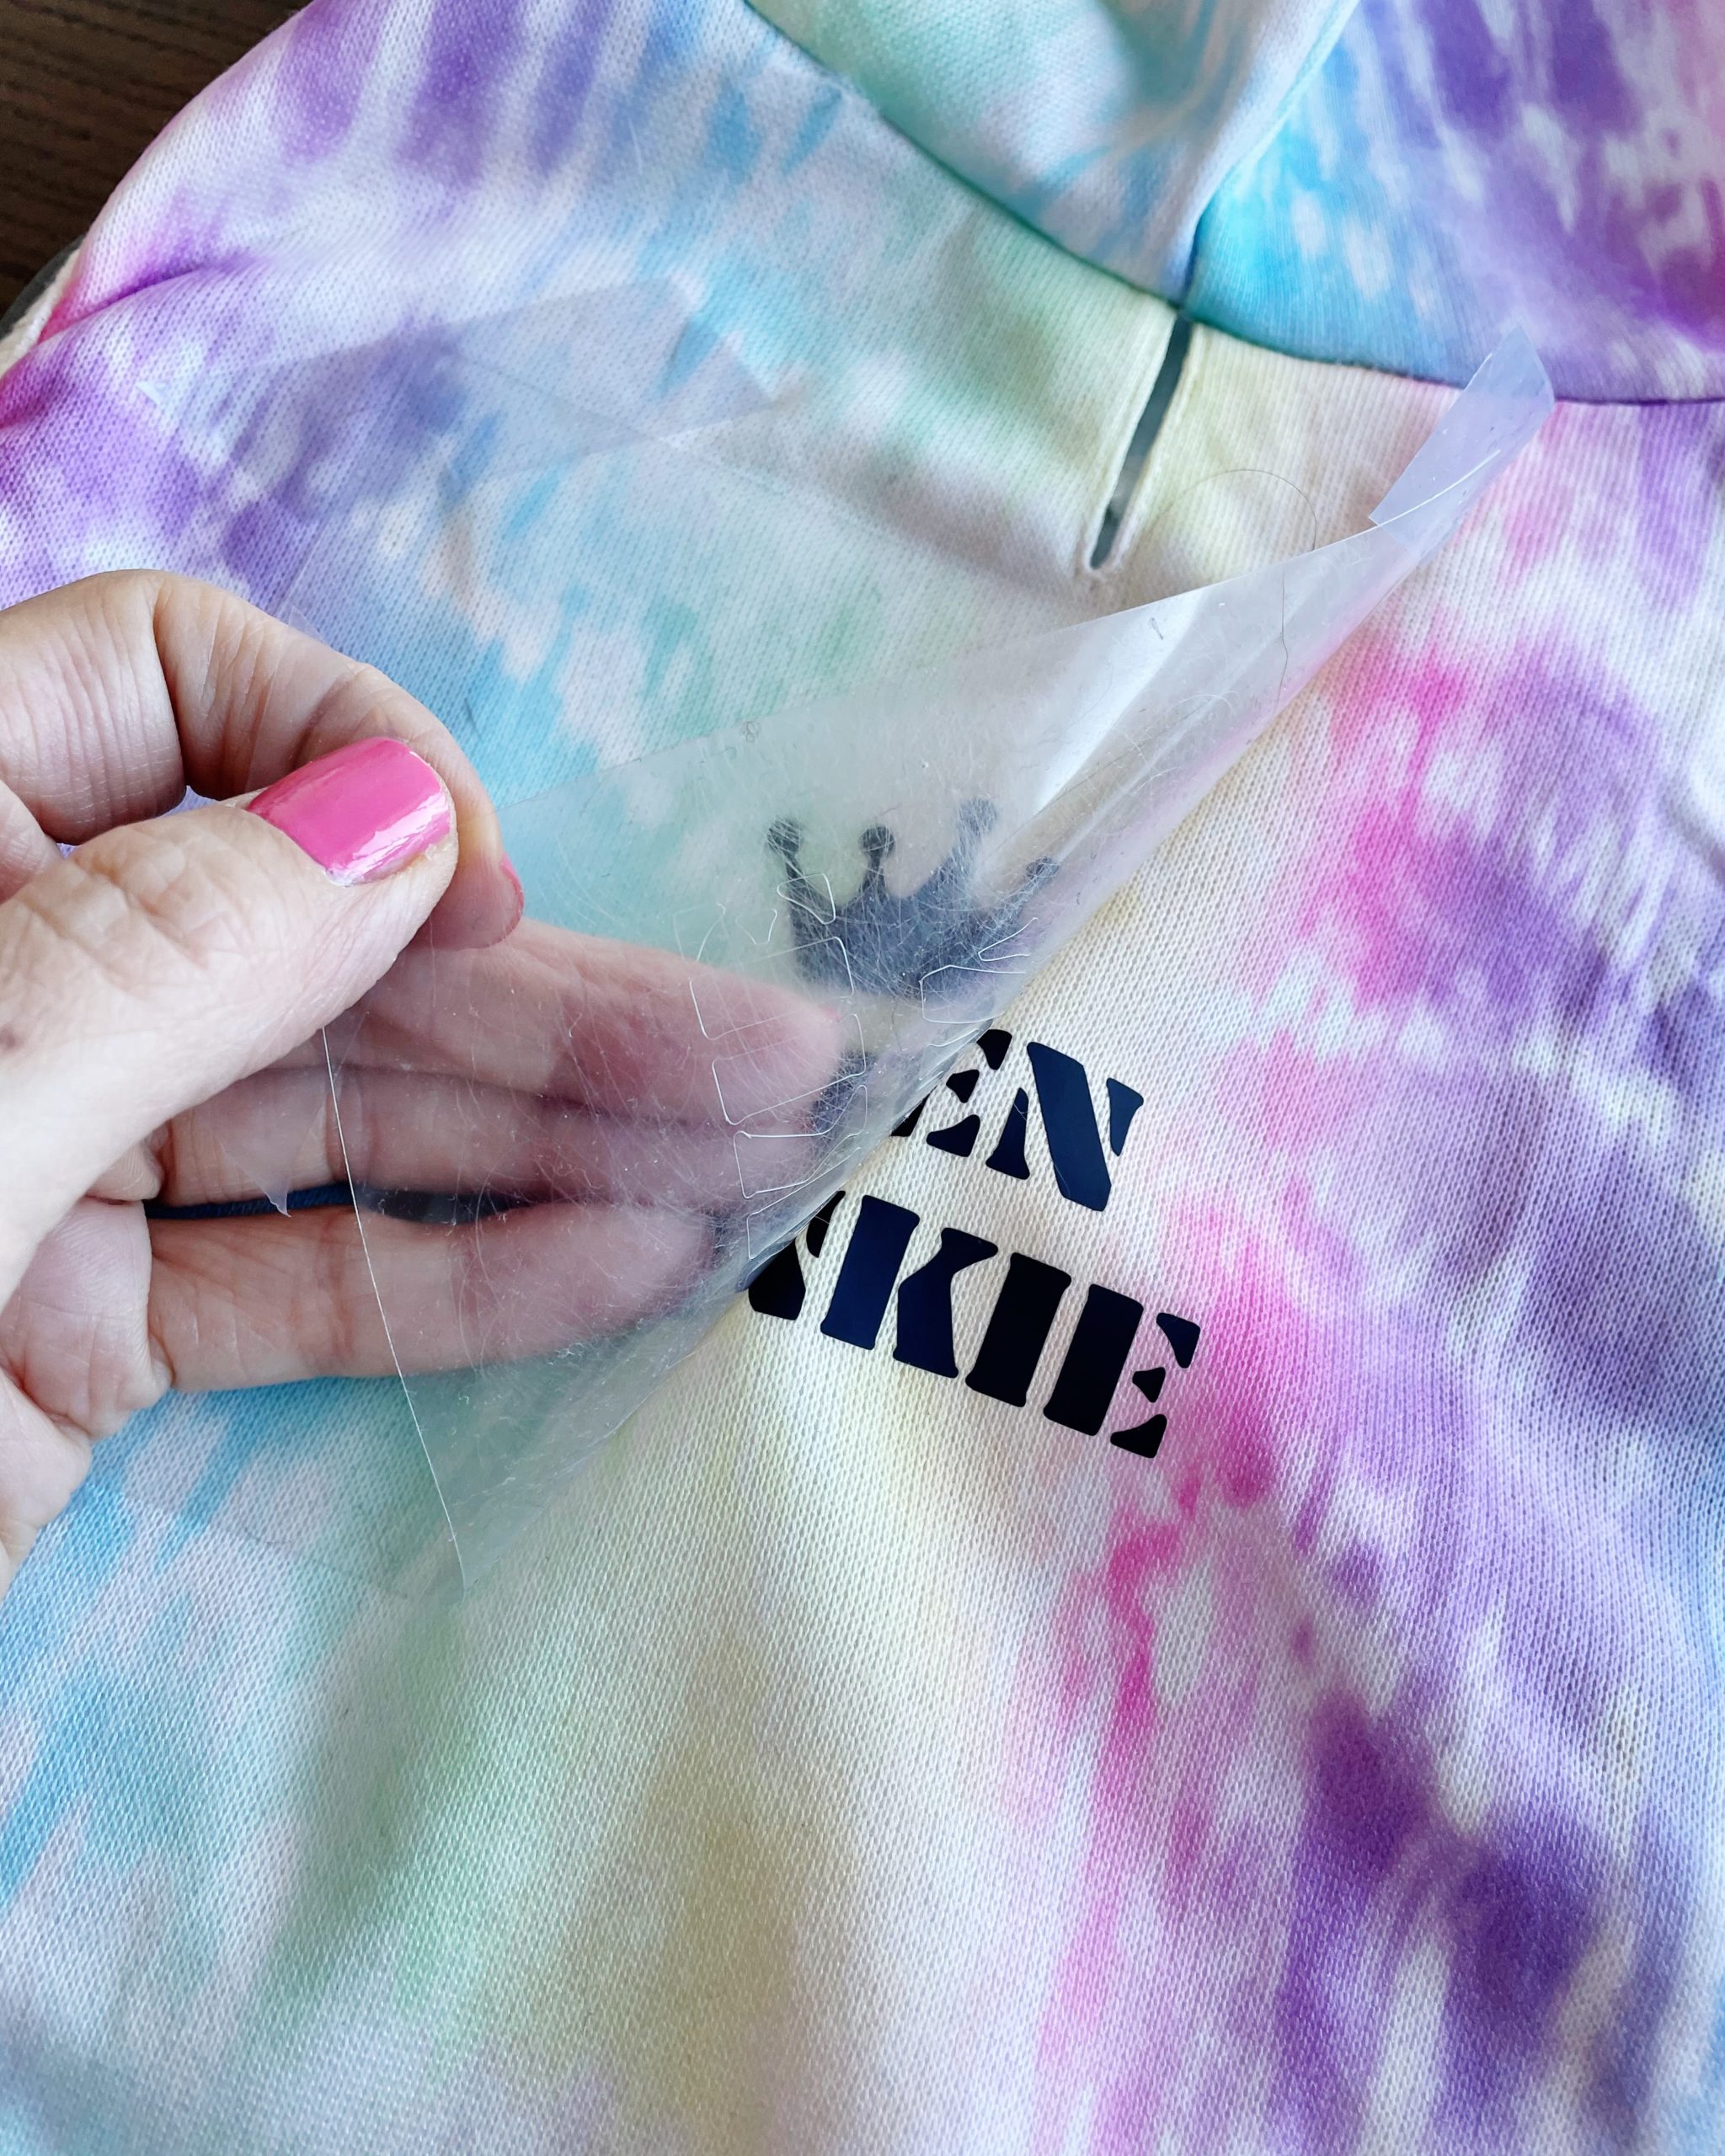
Voila! It is so ridiculously easy.
Step 7:
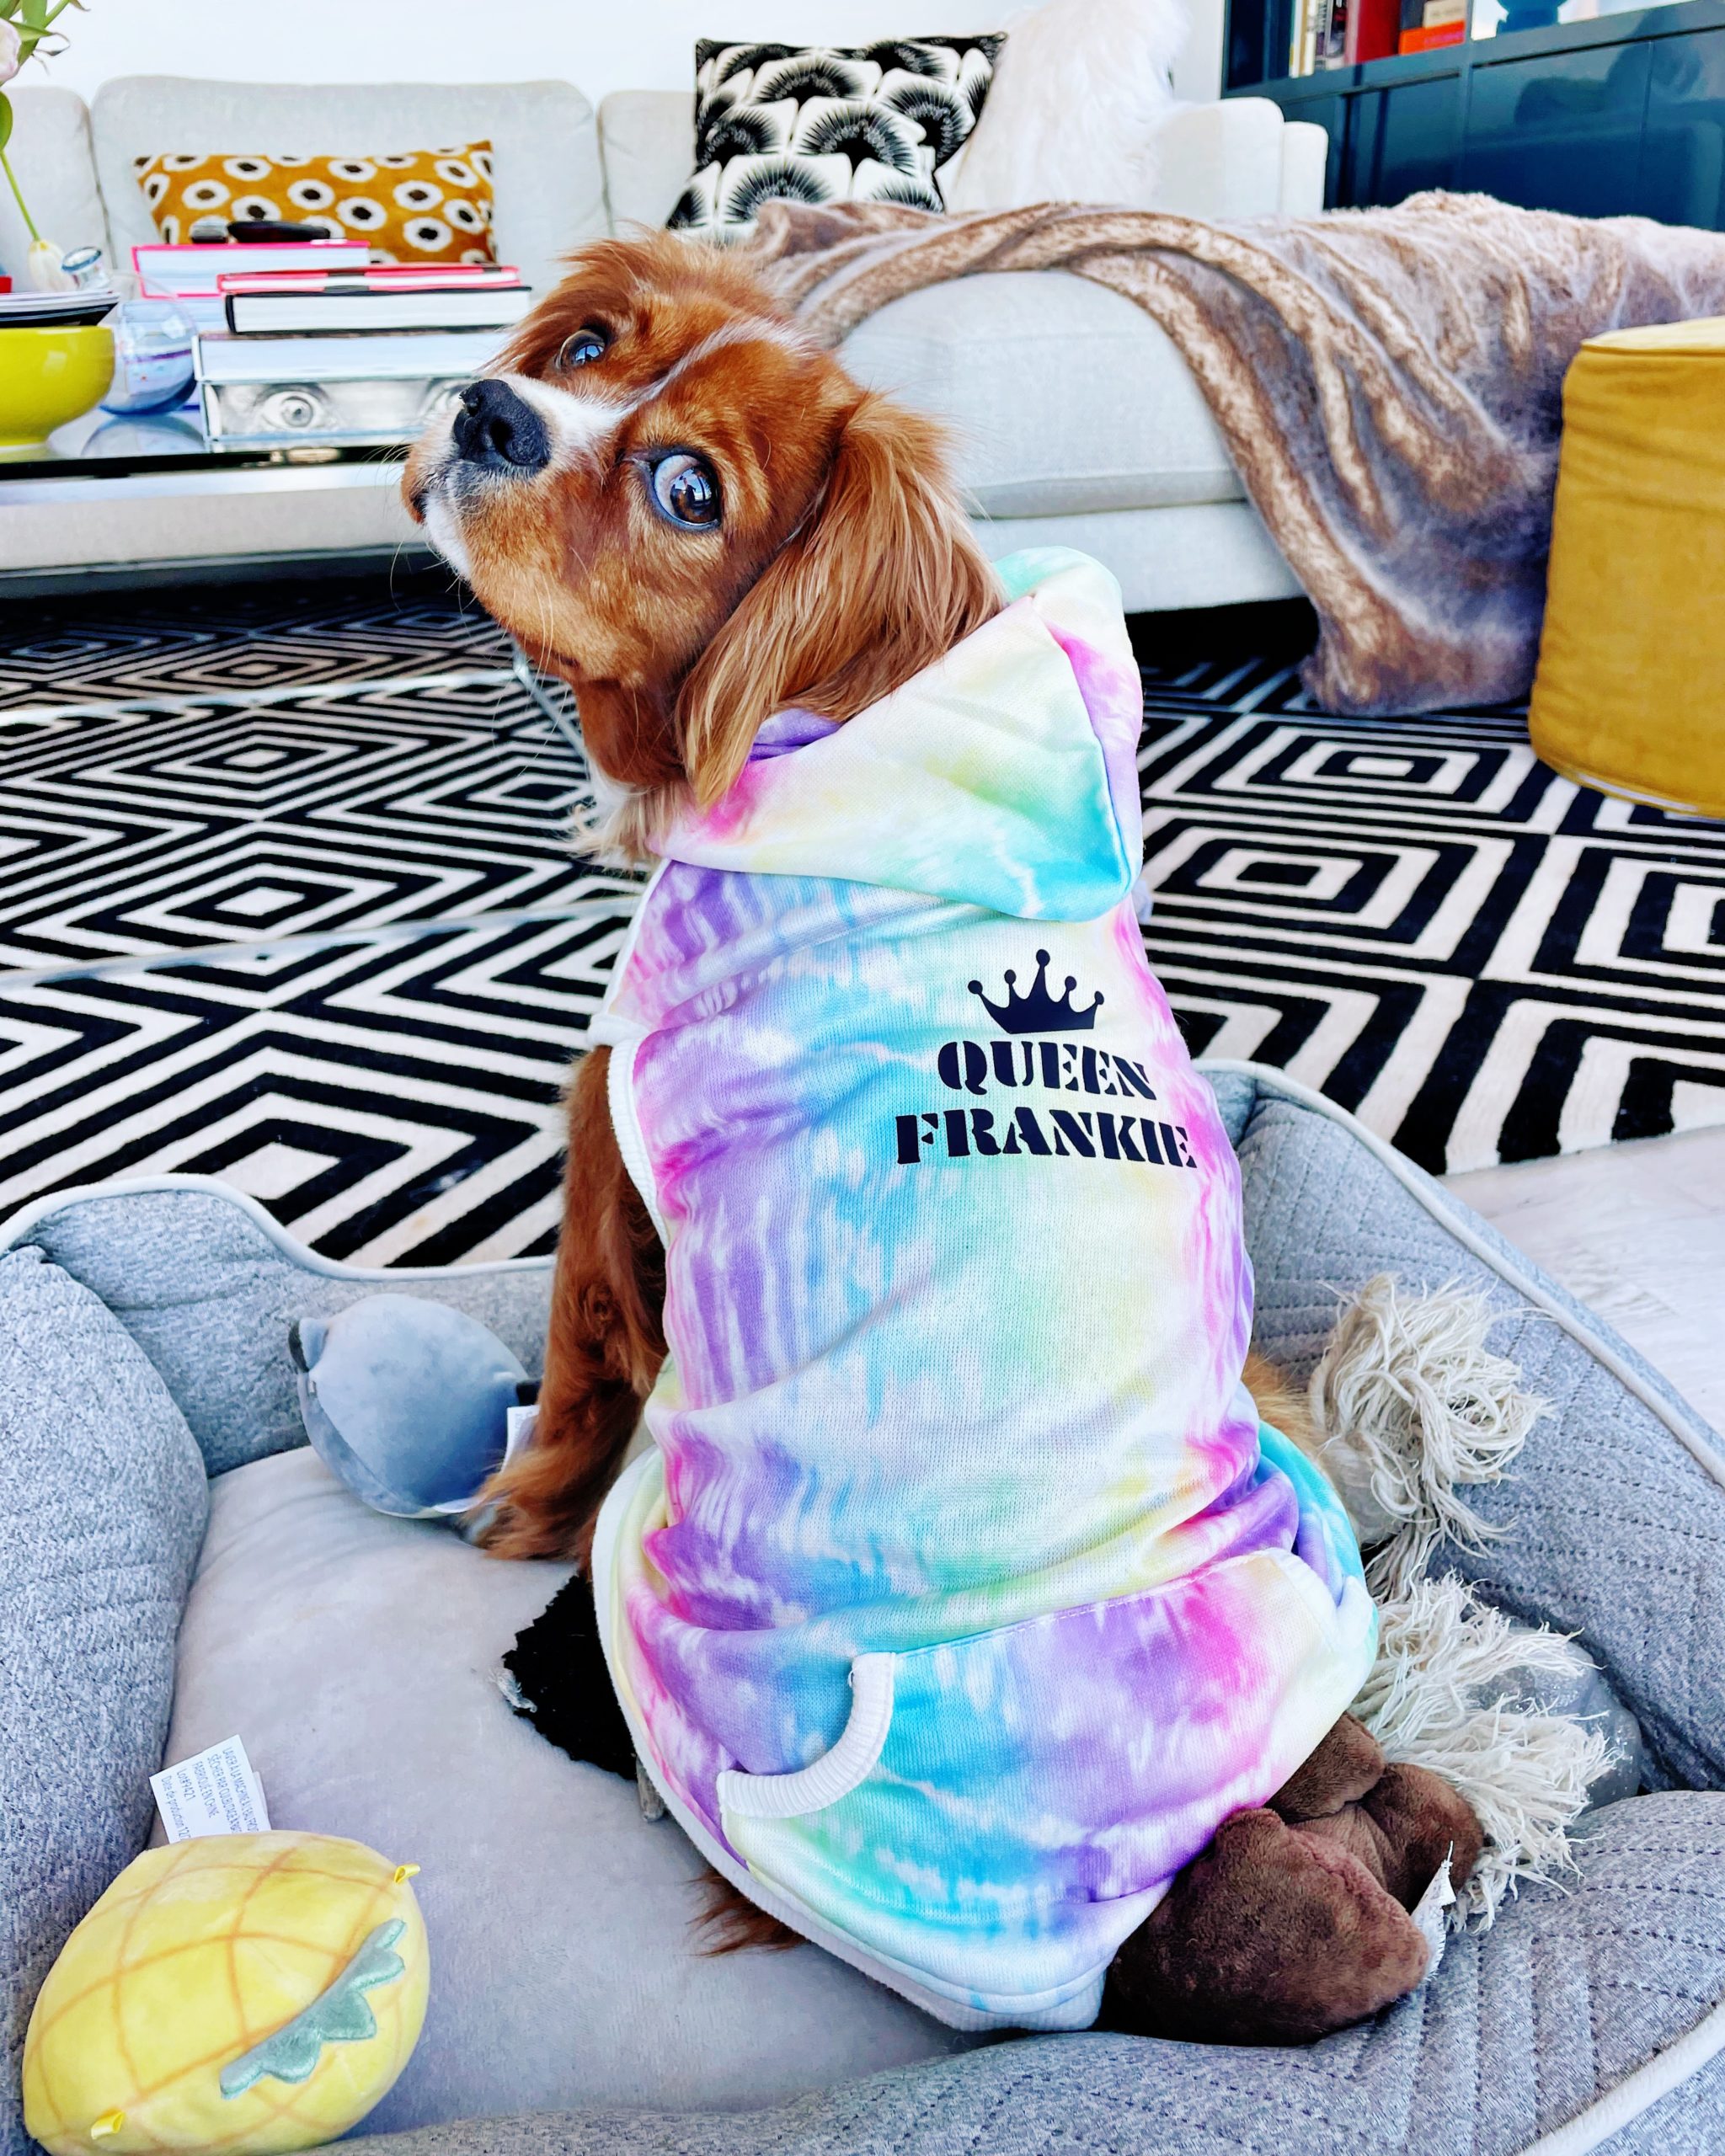
Put your pet fashion on your dog. HOW FREAKIN’ CUTE.
I had so much fun with my new Cricut Joy, I showed Mazzy and Harlow when they got home from school. They both wanted to make their own pet fashions for Frankie. Harlow made a pink onesie similar to the one I made, except it said, “I am the Queen” with a tiara instead of a crown.
Mazzy is in that amazing phase of adolescence when random things presented without context are the best and funniest things. So, after much thought, she designed a dog onesie with a mushroom on it and the word “beans.”
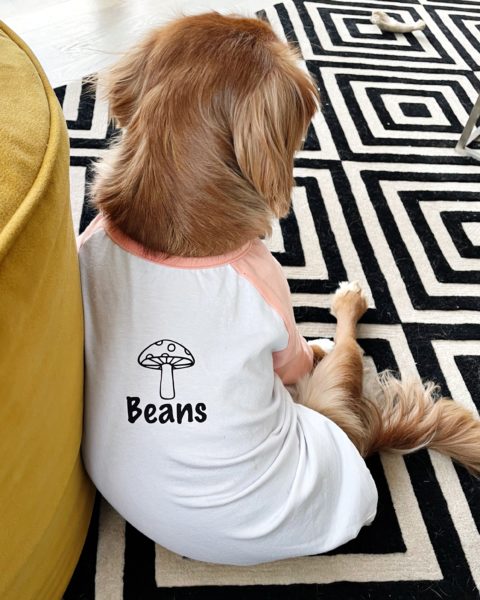
Obviously.
I downloaded the Cricut Joy app on both of their iPads and I predict many more pieces of pet fashion for Frankie in the future!


I love that you can design it now. I used to use one back when you had to have all the different disks. This is SO much easier.
Tell Mazzy I loved the Beans one the best. Definitely cracked up out loud haha
The dog onesies came out awesome! I did not realize how easy the cricut was to use!
The mushroom beans was great!! Lol
Frankie is the perfect model!
Just use your weeder to remove the individual pieced!!
The dog onesies came out beautifully! I had no clue how easy the Cricut was to use!